

Track machine learning experiments with MLFlow
MLFlow basics & Experimentation Tracking Server


In the previous article, we learned what MLOps was. This time around, we get into the nitty-gritty.
There are several stages in developing a machine learning model, the most important of which is experimentation. This is because if you don't have a useable model, you don't have a product.
Let's say you have designed all your ML experiments following the scientific approach. The next stage consists of executing these experiments at scale on specialized hardware and tracking them all.
That's where MLFlow comes in. In this article, you will learn how to integrate MLFlow into your training pipeline.
The Objectives of this tutorial
- Inject MLFlow into a machine learning project from scratch.
- Use MLFlow's experimentation tracking server to track and compare experiments.
- Become familiar with the MLFlow dashboard.
Start the tracking server
Installing MLFlow is quite easy. Run pip install mlflow. Quickstart instructions are available here: mlflow.org/docs/latest/quickstart.html
To start the tracking server, run mlflow server. This will deploy the MLFlow tracking server UI on the localhost port 5000. You can view this UI by going to localhost:5000 in your browser.
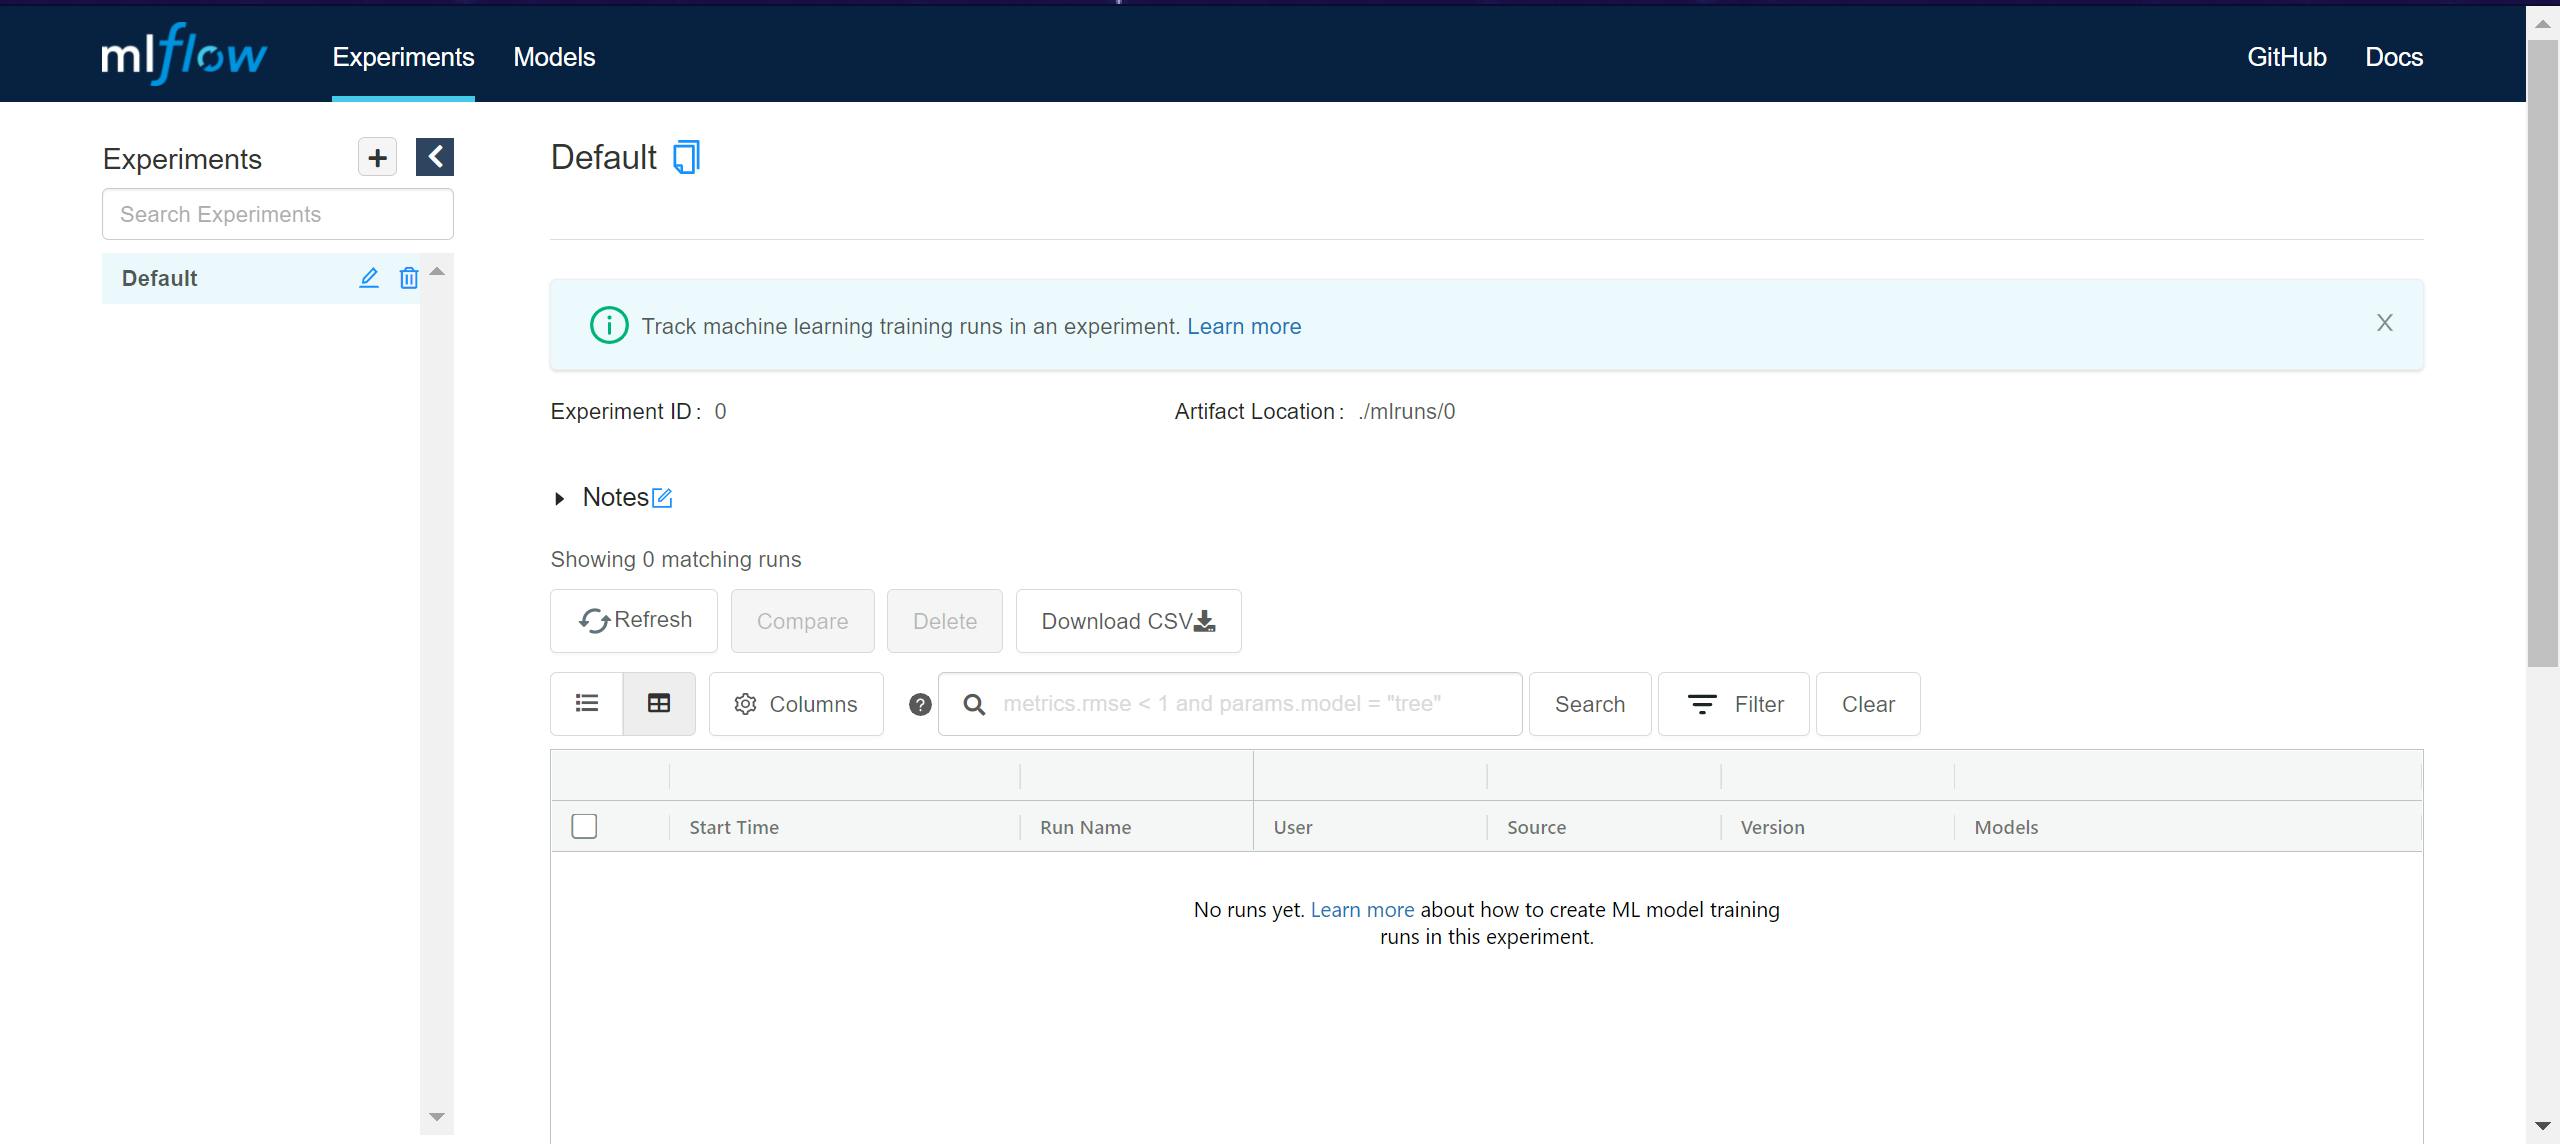
Since we haven't run any experiments yet, the UI is empty and will look something like this,
Injecting MLFlow logging code in our project
For this tutorial, I will be using one of my older repos that I had worked on quite some time ago.
I will inject MLFlow code into this repo and track the hyperparameters and metrics of Capsule Networks trained on MNIST. This code runs quickly without the GPU, so feel free to try it out on your own system😁.
MLFlow logging functions
On the logging front, we will be using the following functions:
mlflow.log_paramsis used for logging hyperparameters of the current experiment runmlflow.log_metricis used for logging any metrics generated by the current experiment run.mlflow.pytorch.log_modelis used to log our PyTorch model.
Additionally, there are a few functions used to set up the mlflow experiment:
mlflow.create_experimentcreates a new MLFlow experiment.mlflow.get_experiment_by_namefetches an already existing MLFlow experiment.mlflow.start_runstarts a new run of the current experiment.
Lastly, we need to point the MLFlow python SDK to a running MLFlow tracking server. We do this by specifying the URI of the tracking server in the mlflow.set_tracking_uri function. Since we ran the tracking server locally, the URI is set to http://localhost:5000.
Using MLFlow in the training script
Alright, now let's begin,
To use MLFlow, we need to set up the MLFlow experiment and add code for logging hyperparameters and metrics in our training pipeline. The following code snippet describes how to set up an MLFlow experiment:
mlflow.set_tracking_uri("http://localhost:5000")
experiment_id = mlflow.get_experiment_by_name("Capsule Nets - MNIST")
if experiment_id is None:
    experiment_id = mlflow.create_experiment("Capsule Nets - MNIST")
else:
    experiment_id = experiment_id.experiment_id
This sets the tracking URI of our currently running tracking server. I have set the name of my experiment as Capsule Nets - MNIST. We first try to see if this experiment exists in the MLFlow tracking server. If not (which is the case when the script is run for the first time), we create an MLFlow experiment, giving it the name Capsule Nets - MNIST. If it does exist, then we extract the experiment_id of the experiment. This id is a unique number given to each MLFlow experiment. We will use this id to match each of our runs to the Capsule Nets - MNIST experiment.
Next, we create a dictionary of all hyperparameters we'd like to track for each run in this experiment. In this case, the dictionary is:
training_parameters = {
    "Batch Size": args.batch_size,
    "Epochs": args.epochs,
    "Optimizer": args.optimizer,
    "Learning Rate": args.lr,
    "GPU Used": args.gpu,
    "Log Interval": args.log_interval,
    }
We can log the metrics through the mlflow.log_metric() function (lines 29-38 & 43-44):
The complete training script is as follows:
Remember the experiment_id that we had extracted before?? That's used in line 143 with the mlflow.start_run() function. This function matches the current run to the correct experiment.
Checklist:
- Run the MLFlow tracking server
- Inject MLFlow logging and experiment setup code into your training pipeline.
If you've done both these steps, congrats!!!🎉🎉🎉 We can now run our experiments.
A sample experiment run call is:
python train_mlflow.py --batch-size 64 --epochs 1 --gpu --optimizer rmsprop.
Upon running the command above, outputs would look something like this:
08/09/2021 03:54:29 PM INFO: Using device: cuda:0
08/09/2021 03:54:29 PM INFO: ==>>> total training batch number: 938
08/09/2021 03:54:29 PM INFO: ==>>> total testing batch number: 157
08/09/2021 03:54:33 PM INFO: Capsule_Net(
(conv1): Conv2d(1, 256, kernel_size=(9, 9), stride=(1, 1))
(primary_caps): Capsule_conv(
(conv): Conv2d(256, 256, kernel_size=(9, 9), stride=(2, 2))
)
(digcaps): Capsule_fc()
(decoder): Sequential(
(0): Linear(in_features=160, out_features=512, bias=True)
(1): ReLU()
(2): Linear(in_features=512, out_features=1024, bias=True)
(3): ReLU()
(4): Linear(in_features=1024, out_features=784, bias=True)
(5): Sigmoid()
)
)
08/09/2021 03:54:33 PM INFO: # parameters: 8215568
08/09/2021 03:54:33 PM INFO: Epoch = 0 Batch n.o.=0 Loss=0.8998 Batch_acc=0.0938
08/09/2021 03:54:34 PM INFO: Epoch = 0 Batch n.o.=1 Loss=0.6960 Batch_acc=0.0312
08/09/2021 03:54:34 PM INFO: Epoch = 0 Batch n.o.=2 Loss=0.6663 Batch_acc=0.4844
08/09/2021 03:54:34 PM INFO: Epoch = 0 Batch n.o.=3 Loss=2.5510 Batch_acc=0.1875
08/09/2021 03:54:34 PM INFO: Epoch = 0 Batch n.o.=4 Loss=1.7653 Batch_acc=0.0938
08/09/2021 03:54:34 PM INFO: Epoch = 0 Batch n.o.=5 Loss=0.9981 Batch_acc=0.2656
08/09/2021 03:54:34 PM INFO: Epoch = 0 Batch n.o.=6 Loss=0.8751 Batch_acc=0.0938
.
.
.
.
08/09/2021 03:59:35 PM INFO: Epoch = 0 Batch n.o.=929 Loss=0.0540 Batch_acc=0.9531
08/09/2021 03:59:35 PM INFO: Epoch = 0 Batch n.o.=930 Loss=0.0685 Batch_acc=0.9375
08/09/2021 03:59:35 PM INFO: Epoch = 0 Batch n.o.=931 Loss=0.0530 Batch_acc=0.9375
08/09/2021 03:59:35 PM INFO: Epoch = 0 Batch n.o.=932 Loss=0.0498 Batch_acc=0.9688
08/09/2021 03:59:35 PM INFO: Epoch = 0 Batch n.o.=933 Loss=0.0540 Batch_acc=0.9531
08/09/2021 03:59:35 PM INFO: Epoch = 0 Batch n.o.=934 Loss=0.0402 Batch_acc=0.9688
08/09/2021 03:59:35 PM INFO: Epoch = 0 Batch n.o.=935 Loss=0.0384 Batch_acc=0.9844
08/09/2021 03:59:35 PM INFO: Epoch = 0 Batch n.o.=936 Loss=0.1112 Batch_acc=0.8750
08/09/2021 03:59:35 PM INFO: Epoch = 0 Batch n.o.=937 Loss=0.1085 Batch_acc=0.4531
08/09/2021 03:59:35 PM INFO:
Avg Loss=0.0927 time taken = 71.49
08/09/2021 03:59:39 PM INFO:
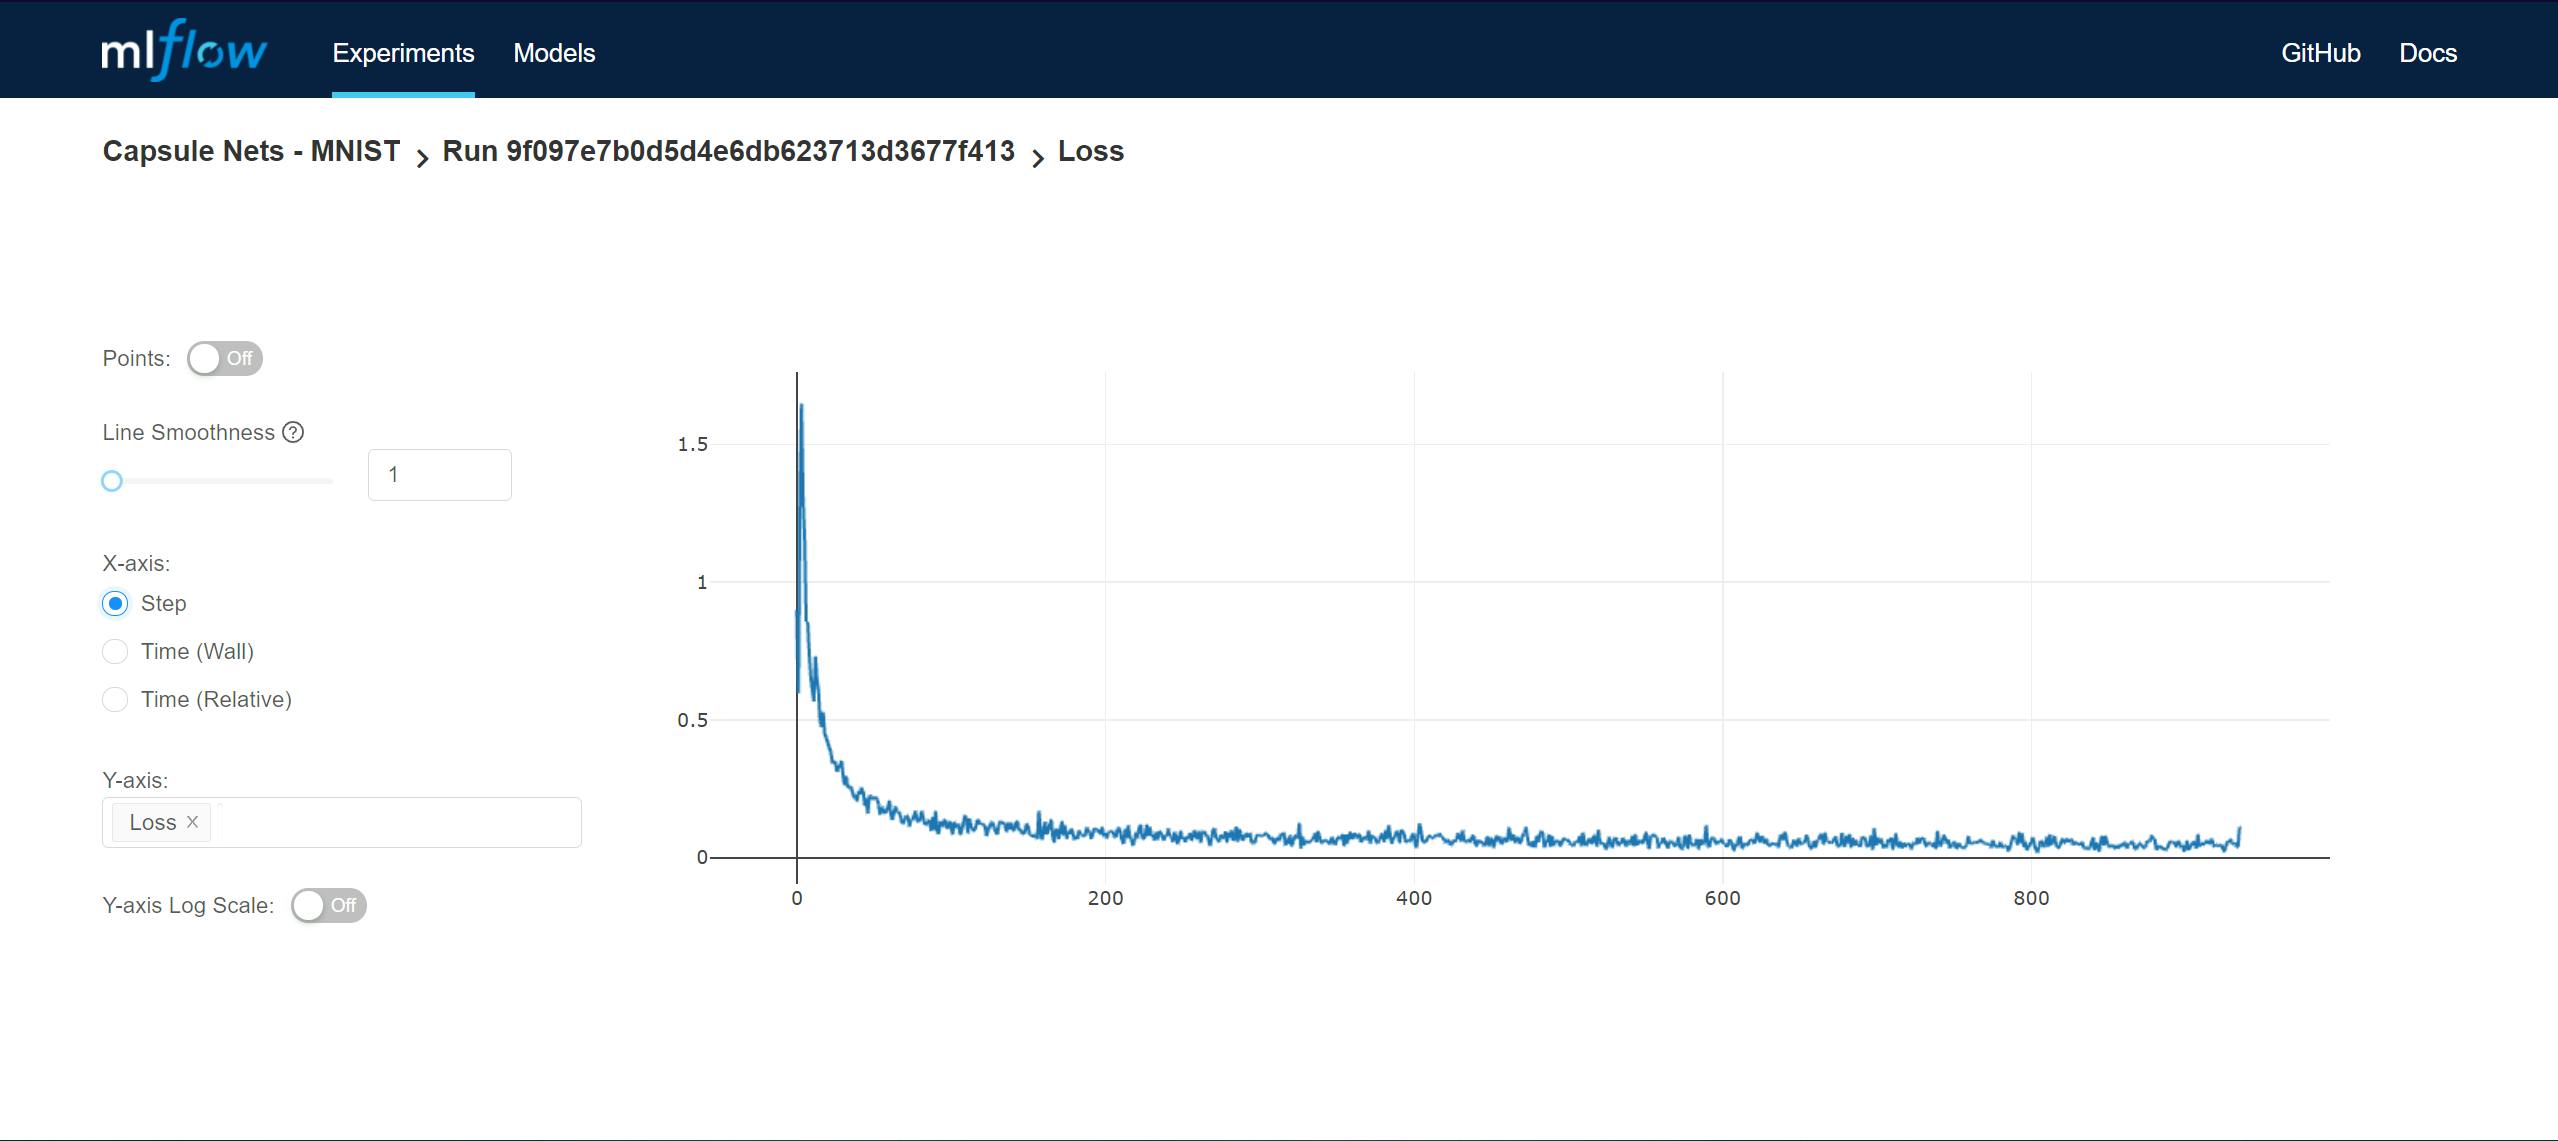
Epoch:0 Test Accuracy=0.9639
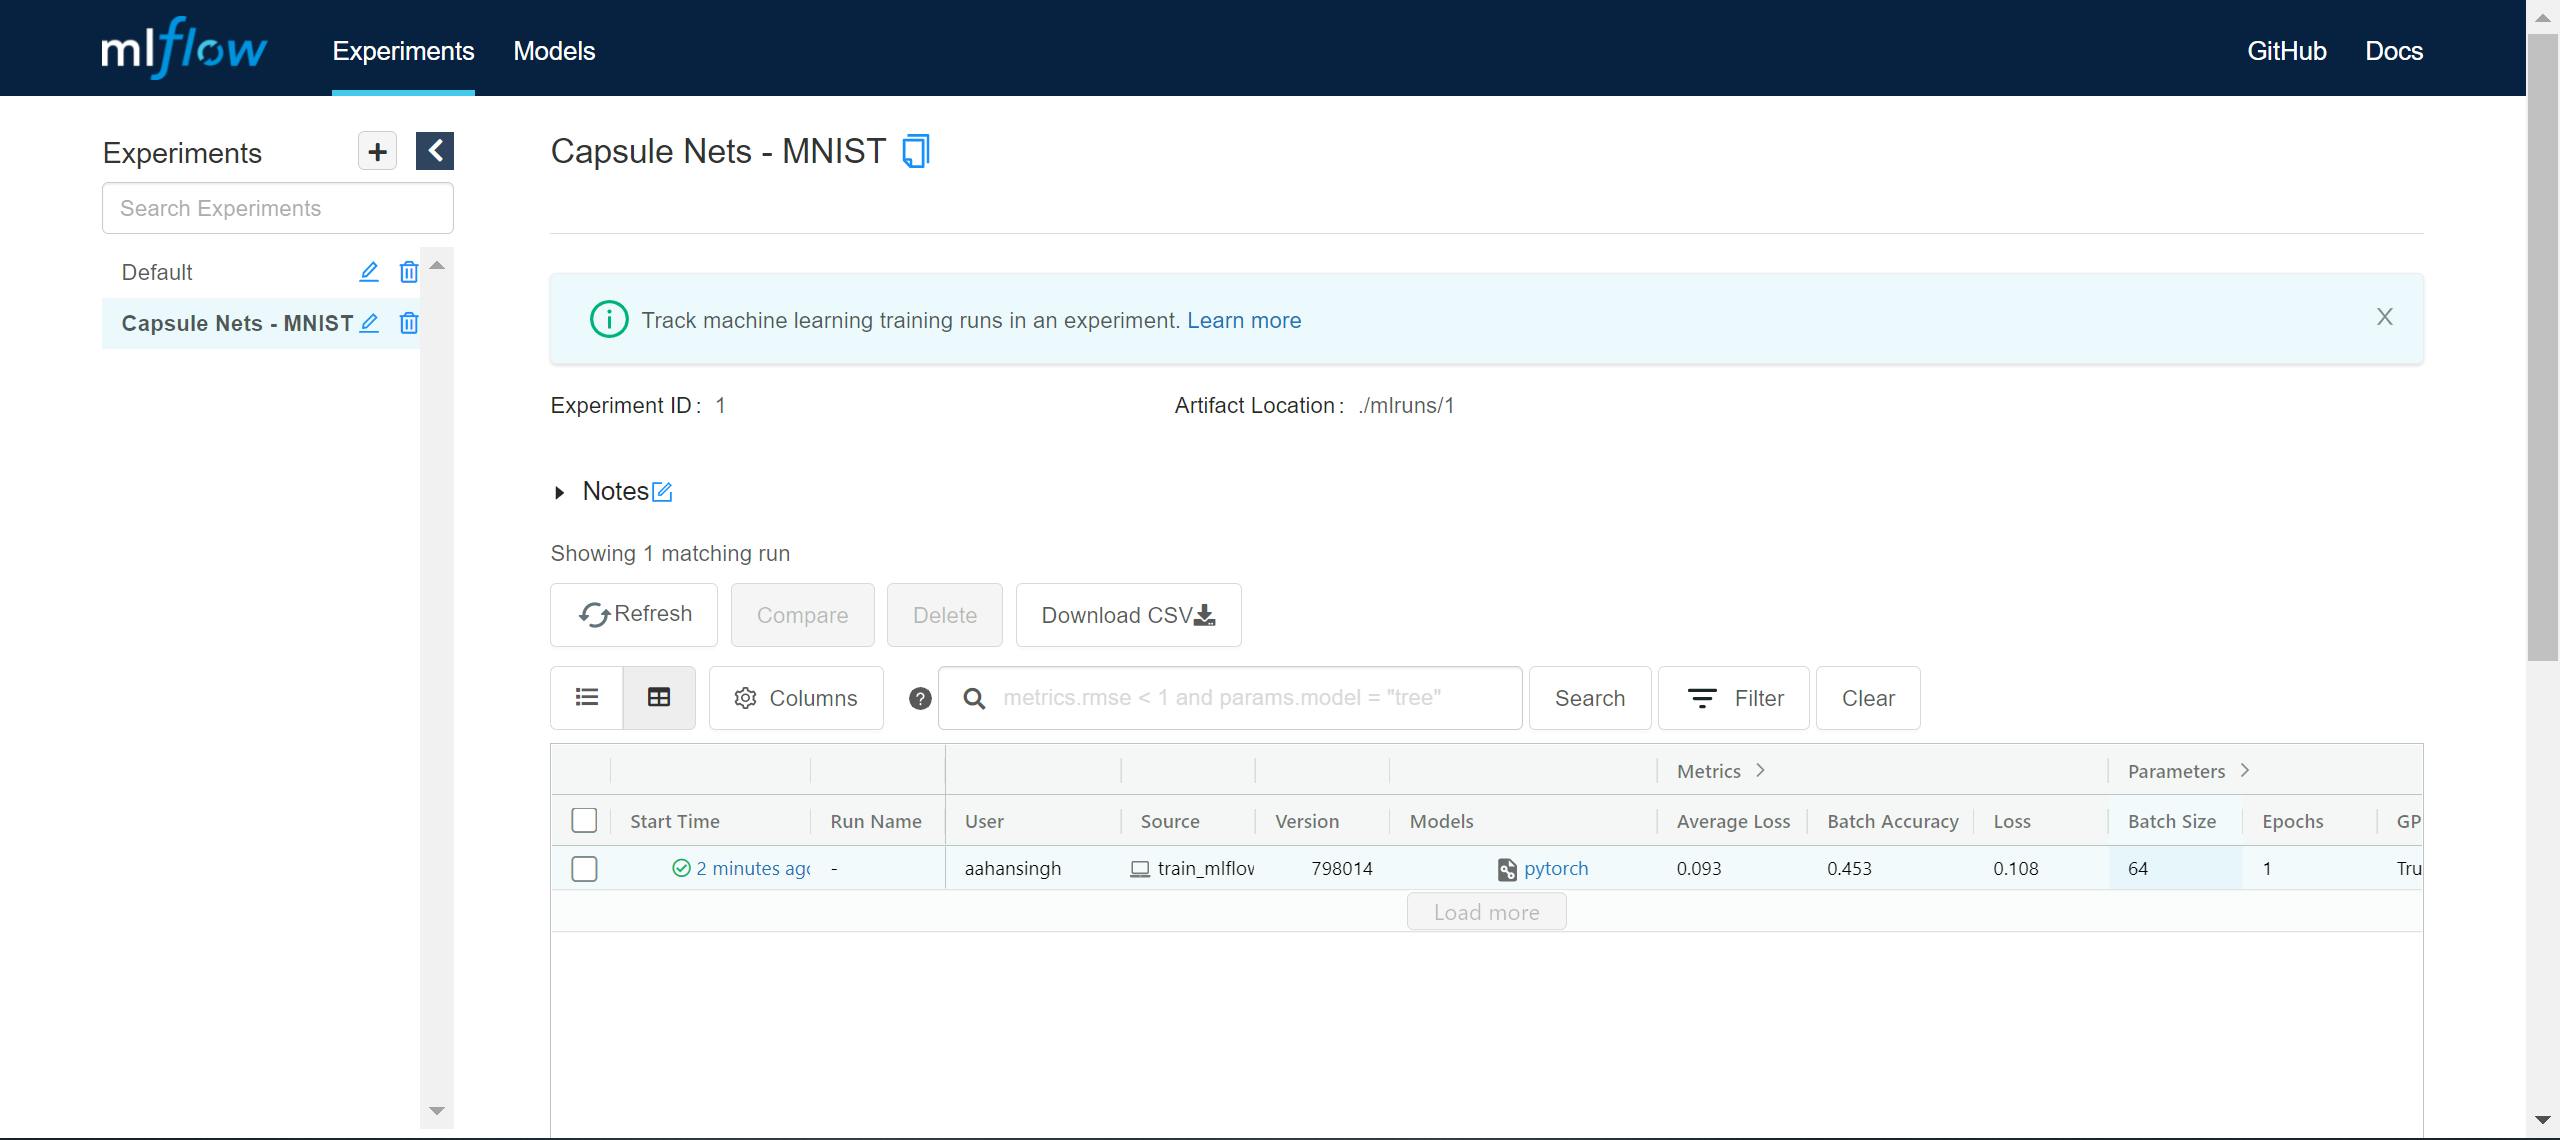
If you check the MLFlow dashboard, you will now see a new tab on the left with the experiment name Capsule Nets - MNIST:
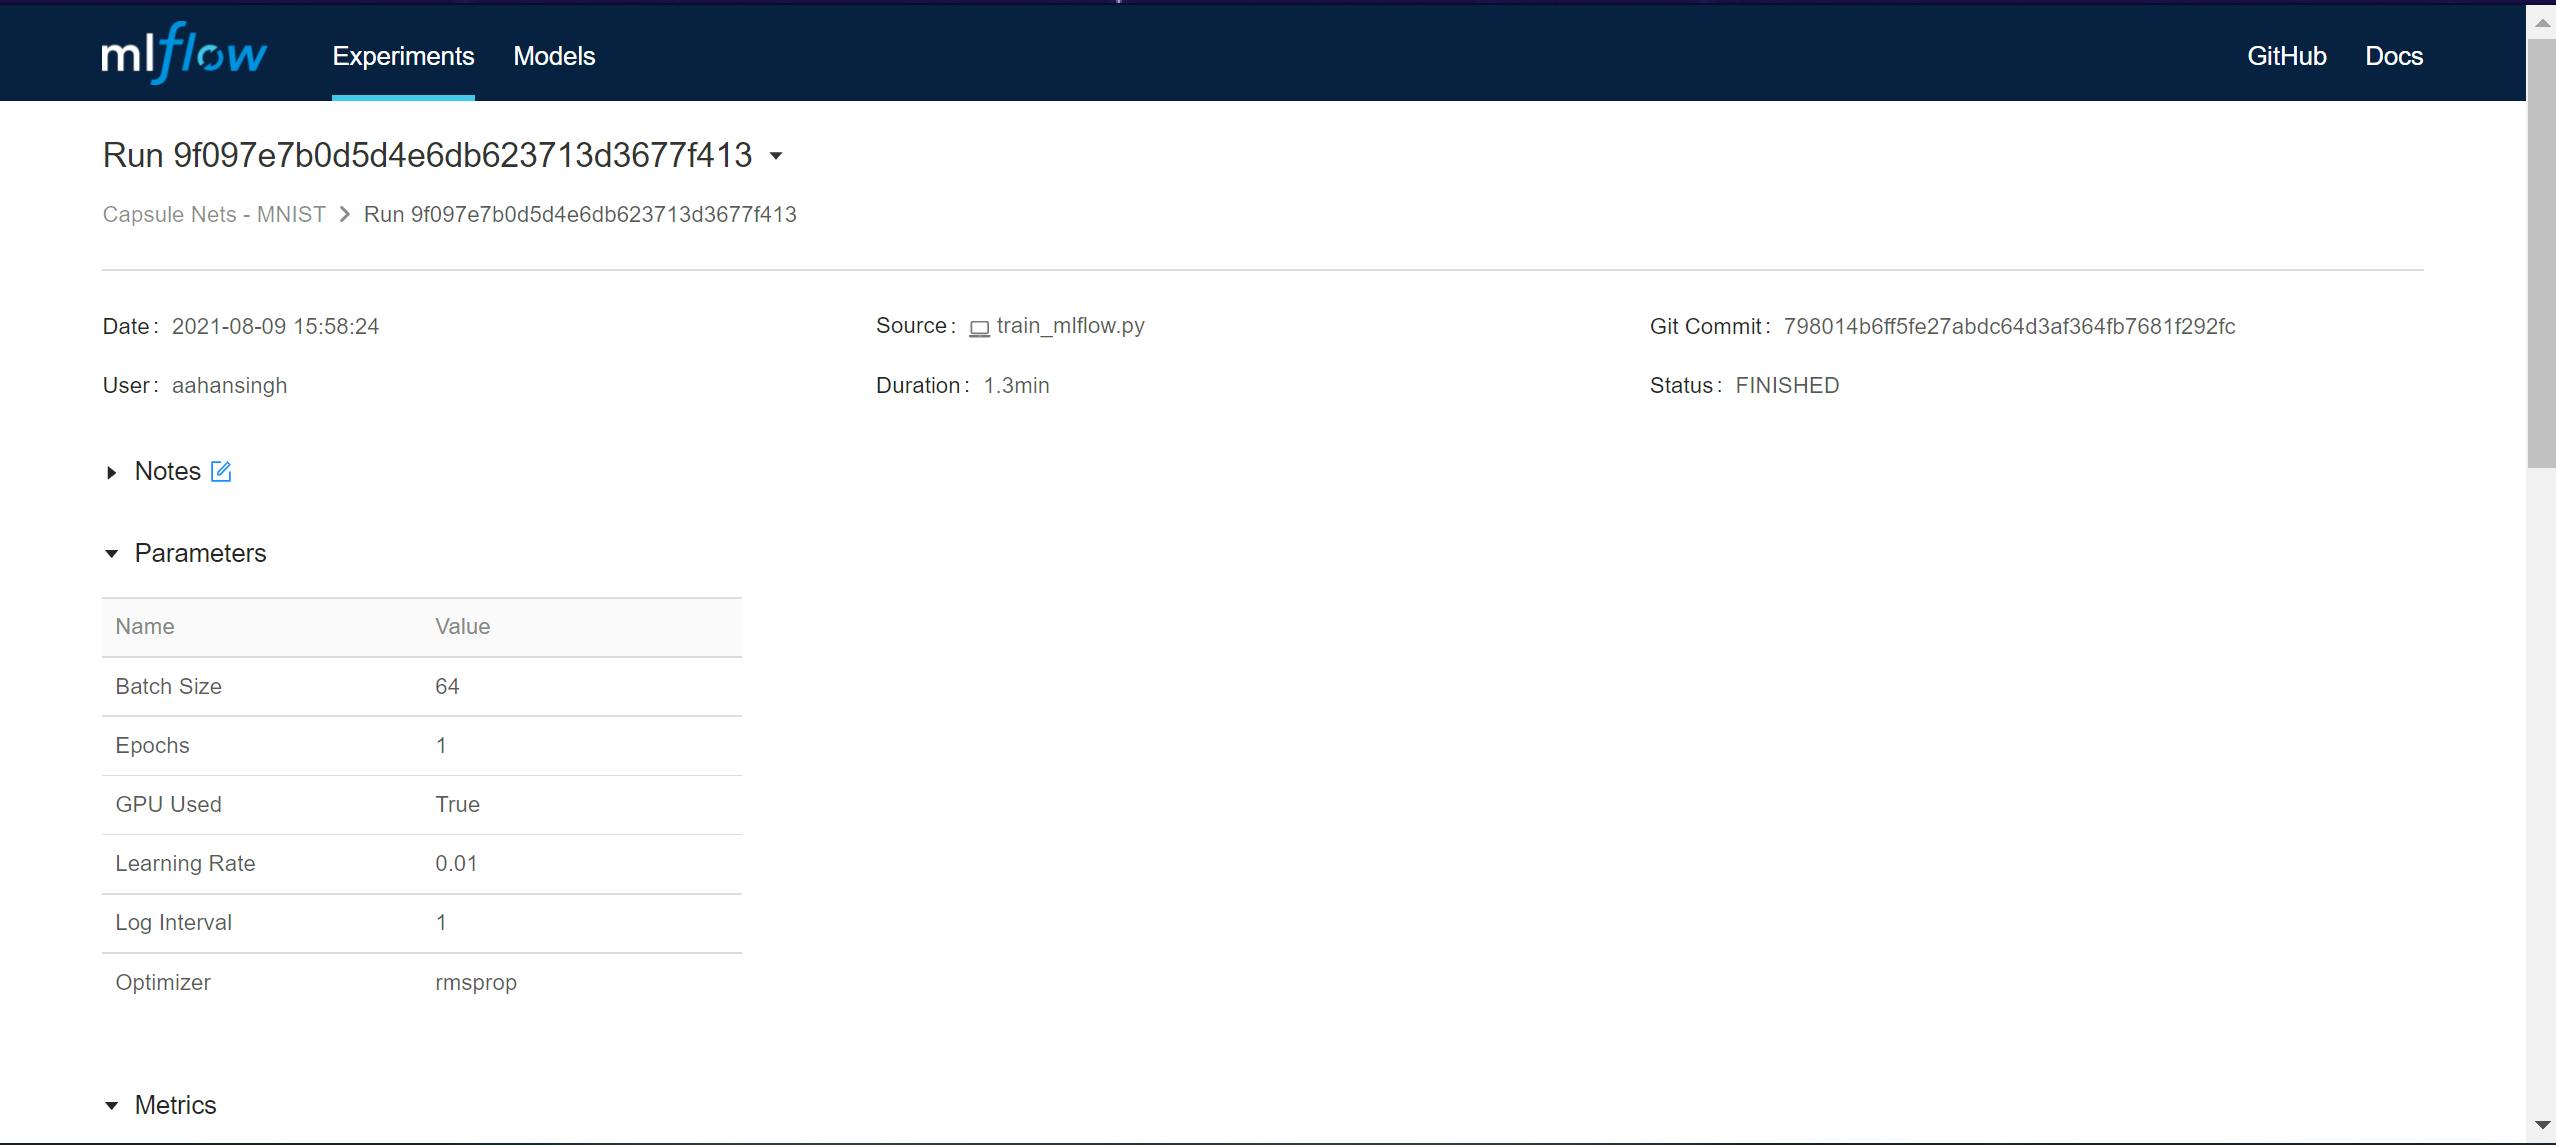
Clicking on an experiment run opens a new window with all the details about the experiment.
All of our tracked hyperparameters are under the Parameters section:
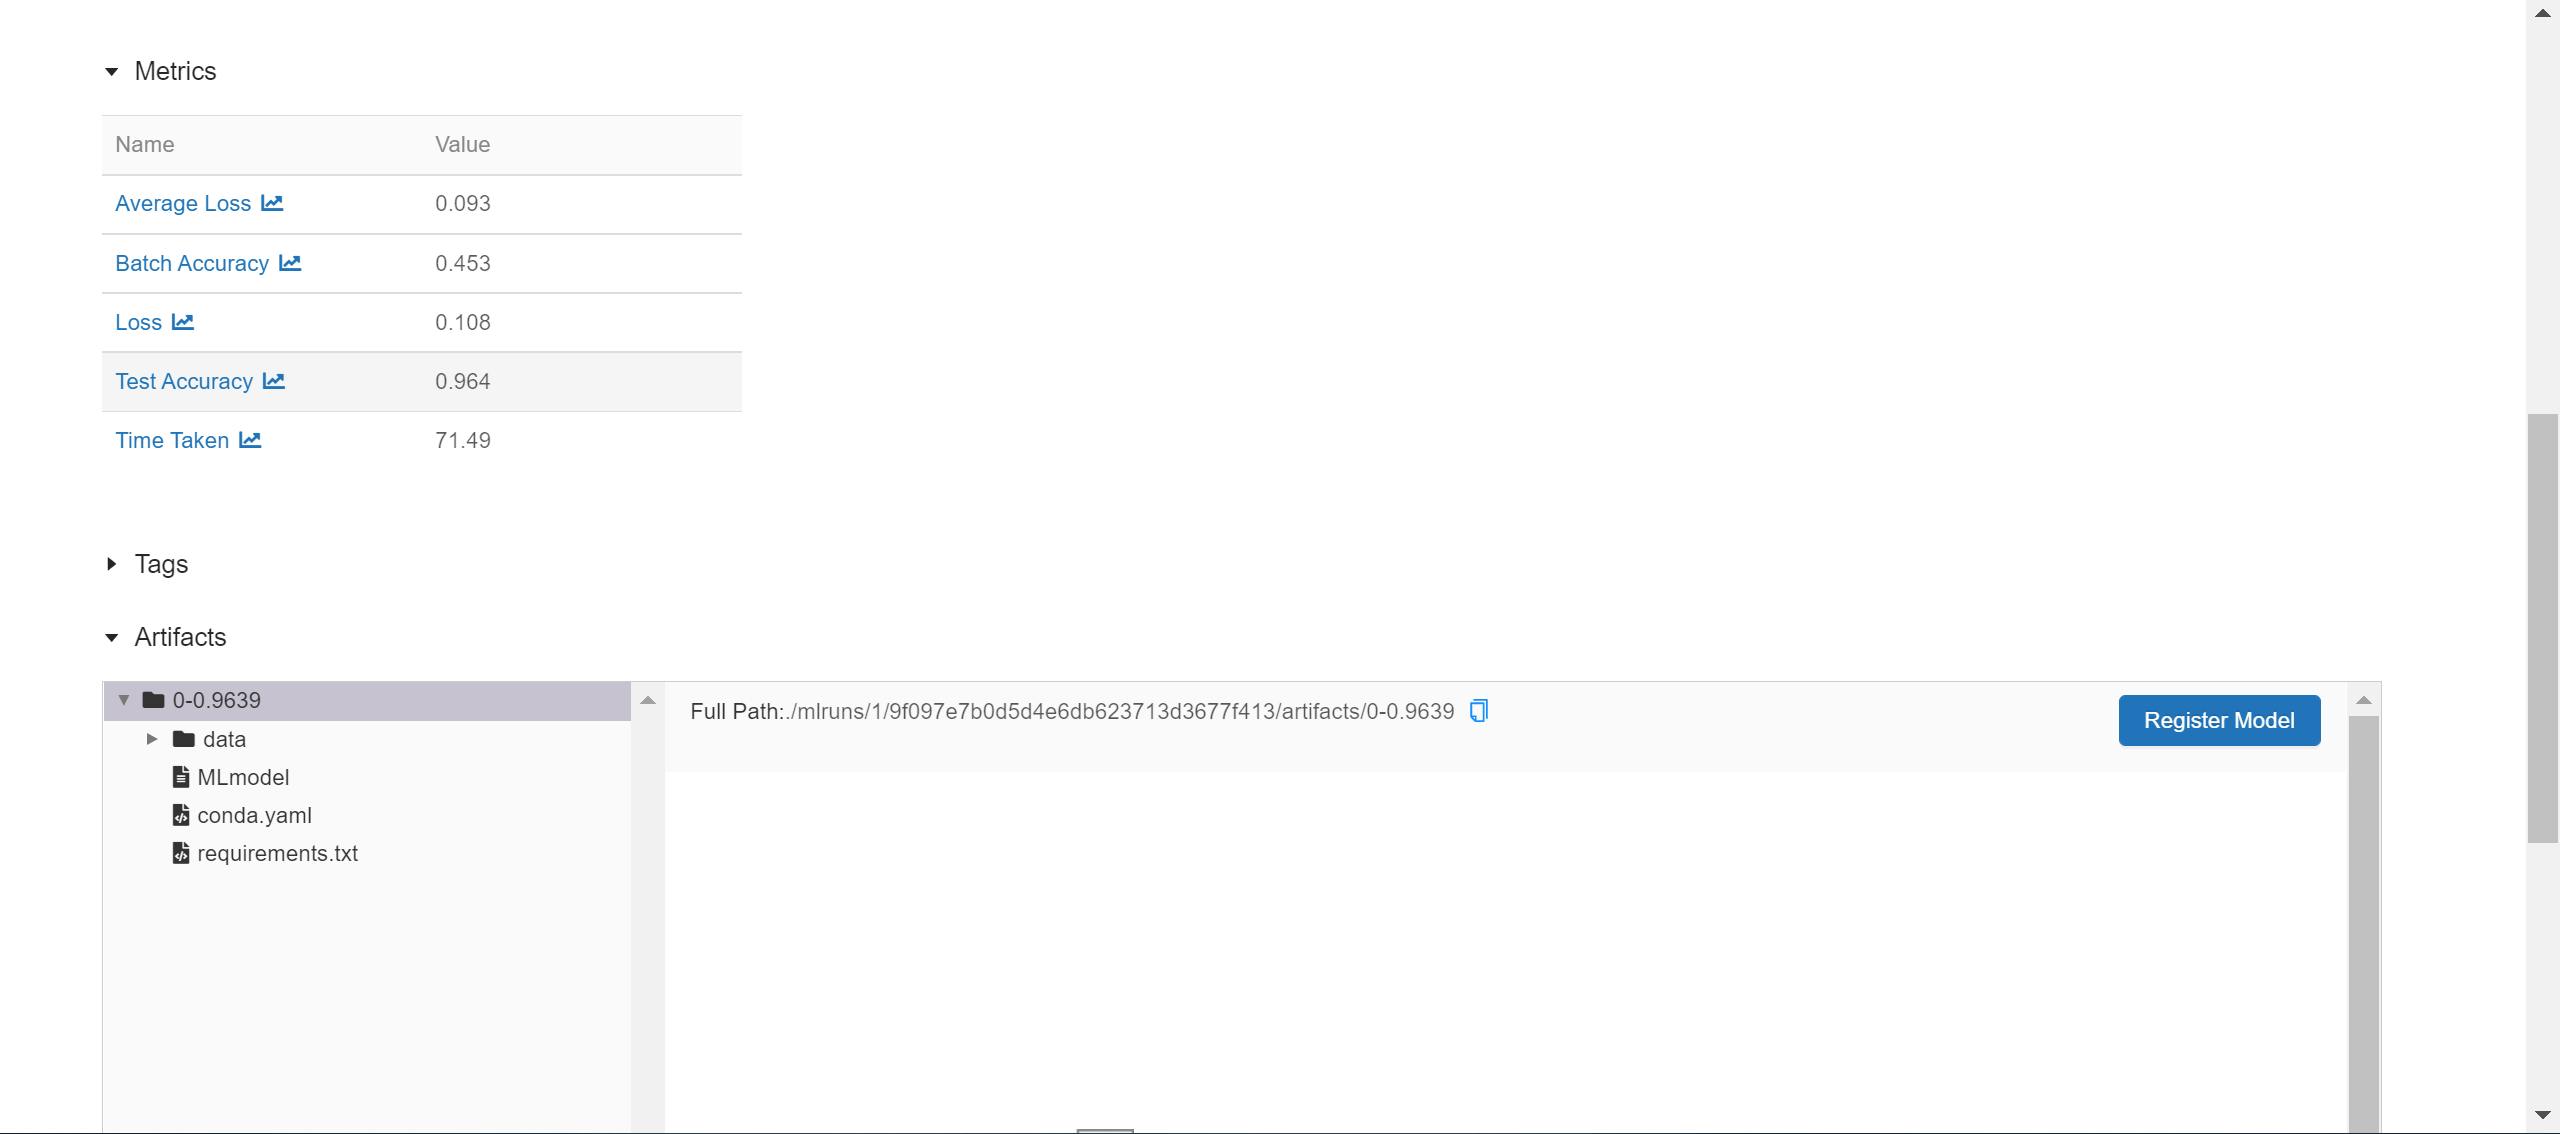
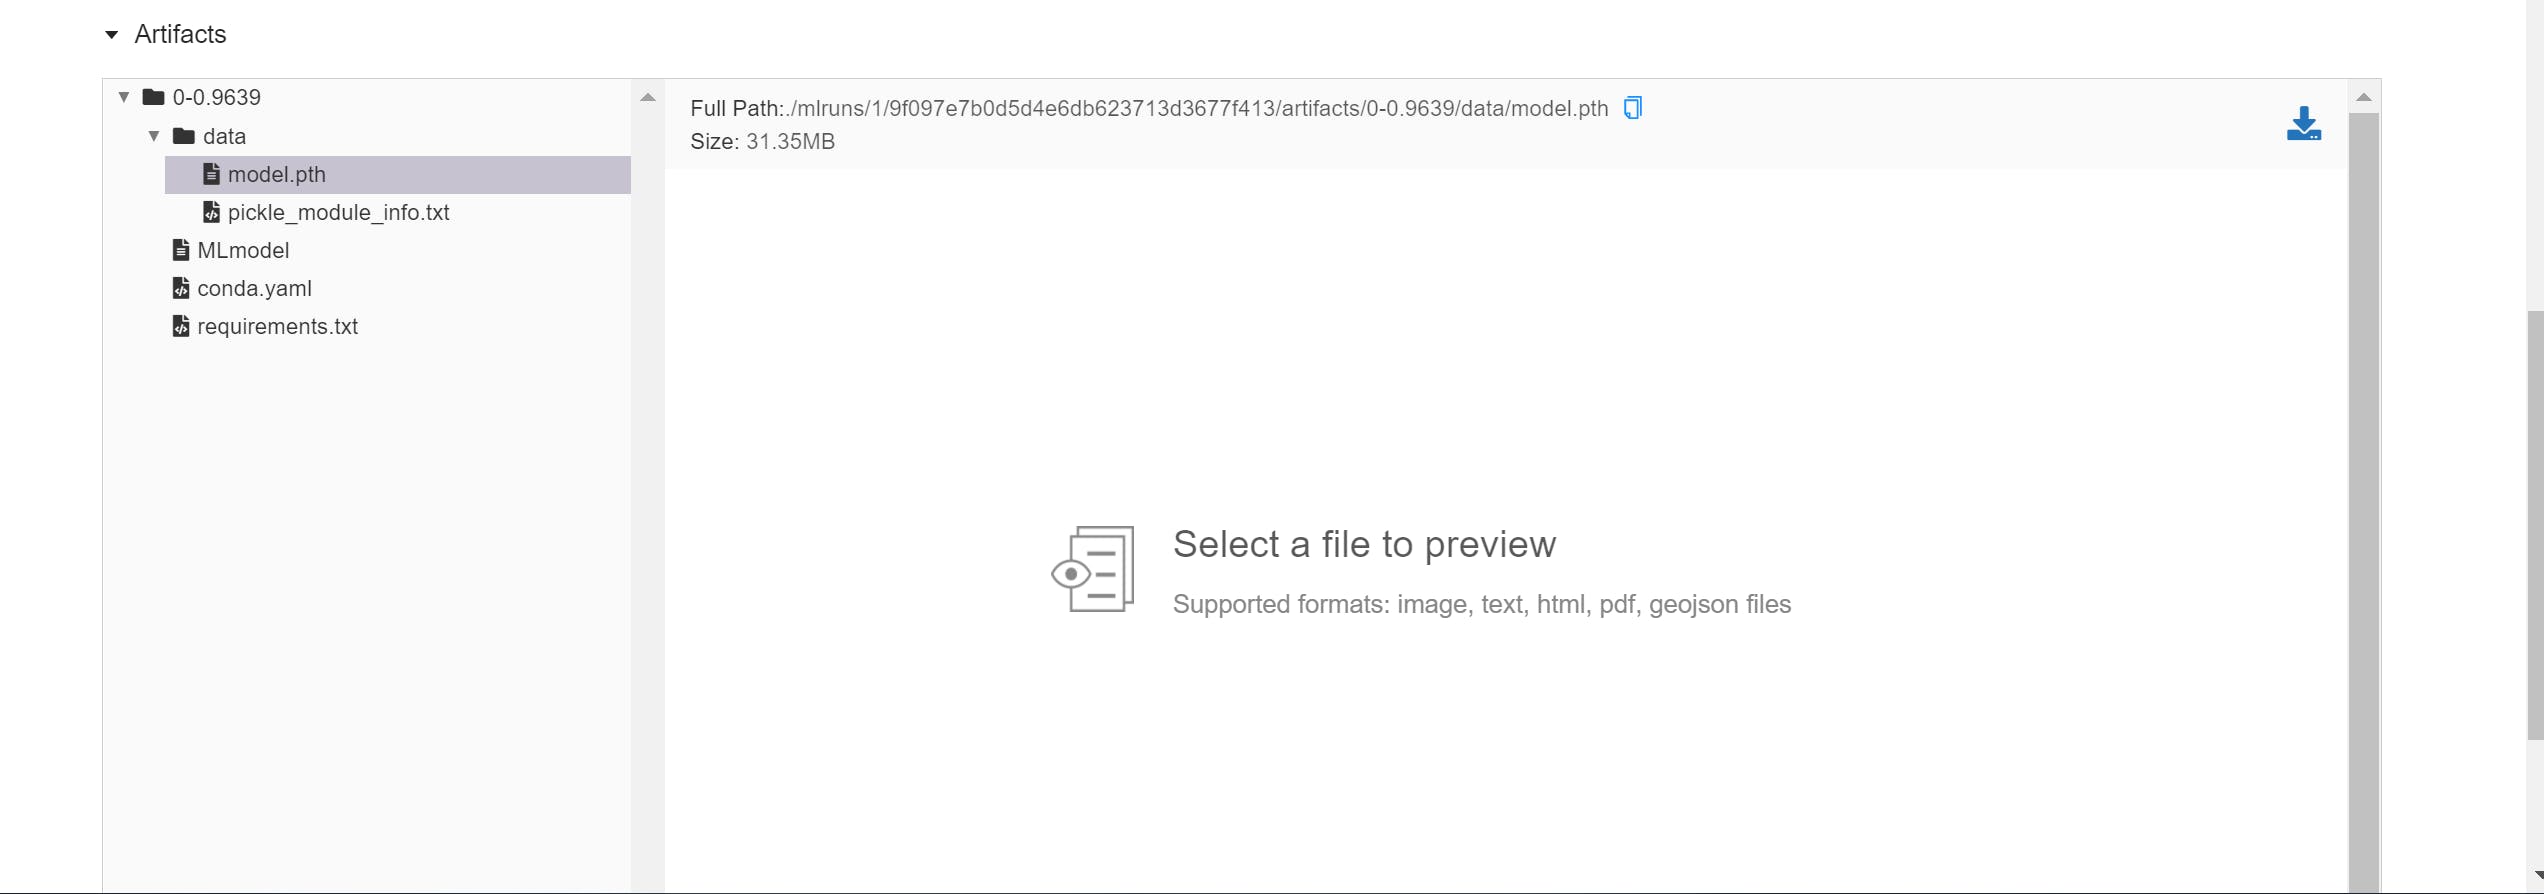
The metrics and models that we have logged can be viewed in their respective sections too:
MLFlow also creates graphs of all the logged metrics. And this is framework agnostic, so it works with any ml framework from PyTorch to TensorFlow to Scikit-learn. We don't need to worry about integrating Tensorboard in our pipelines anymore.
The model that we had logged is saved quite neatly. MLFlow packages the model so that it can be served via MLFlow serving. All of our logged models are available under the Artifacts section of the corresponding experiment run page.
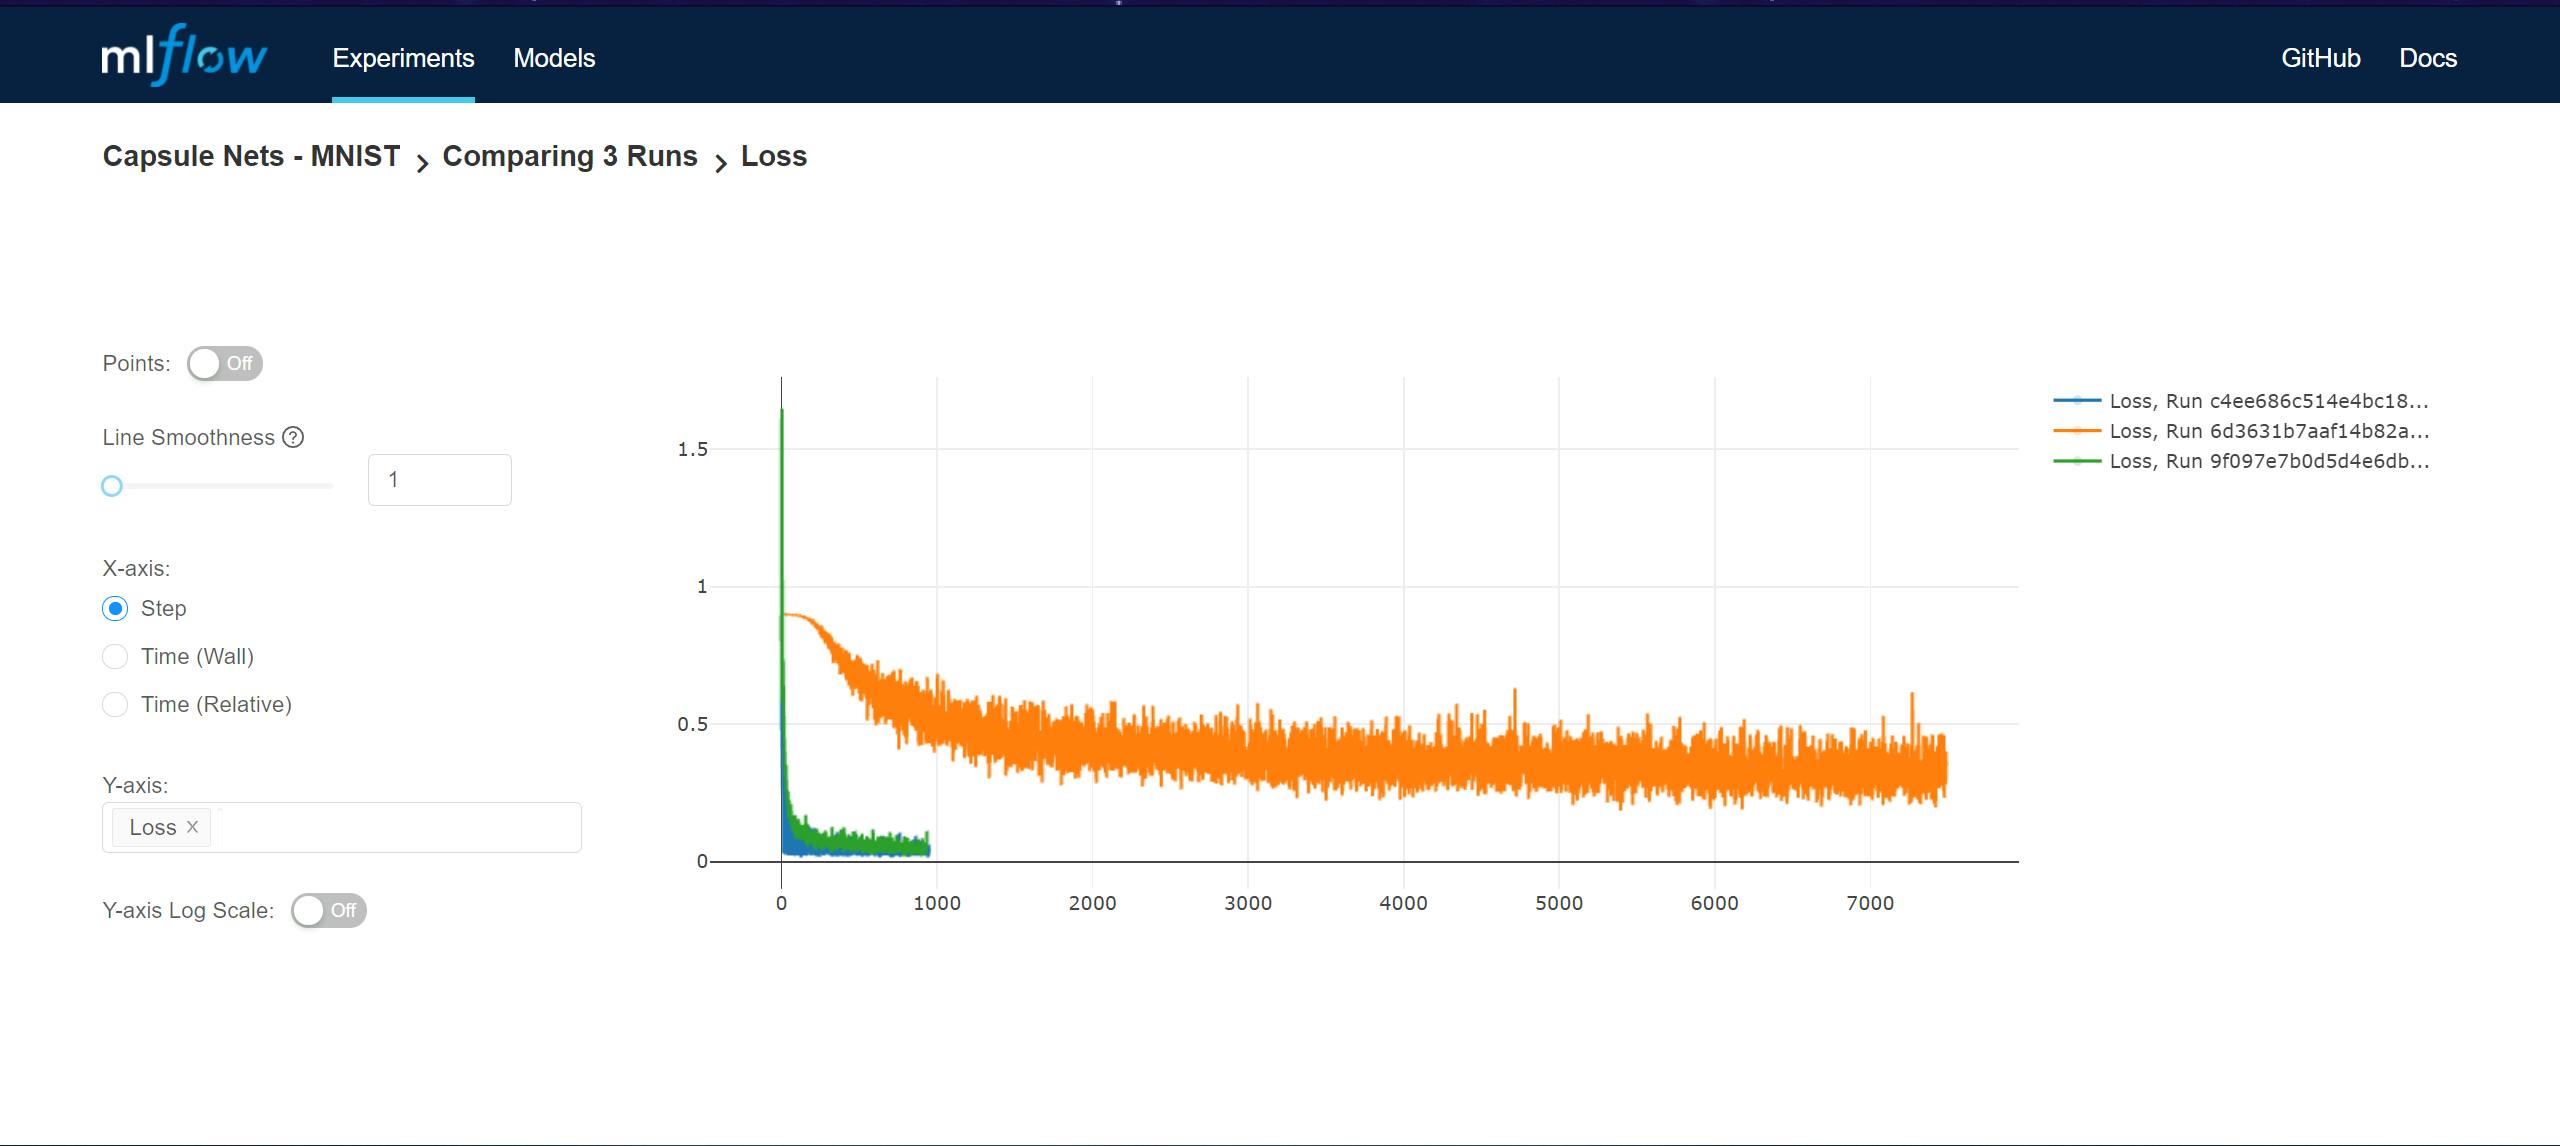
Let's say we run multiple experiments with different hyperparameters. Then, MLFlow can be used to compare all the trained models.
In the screenshot below, there are 3 runs of the same experiment being compared. MLFlow highlights the difference in parameters between the runs.
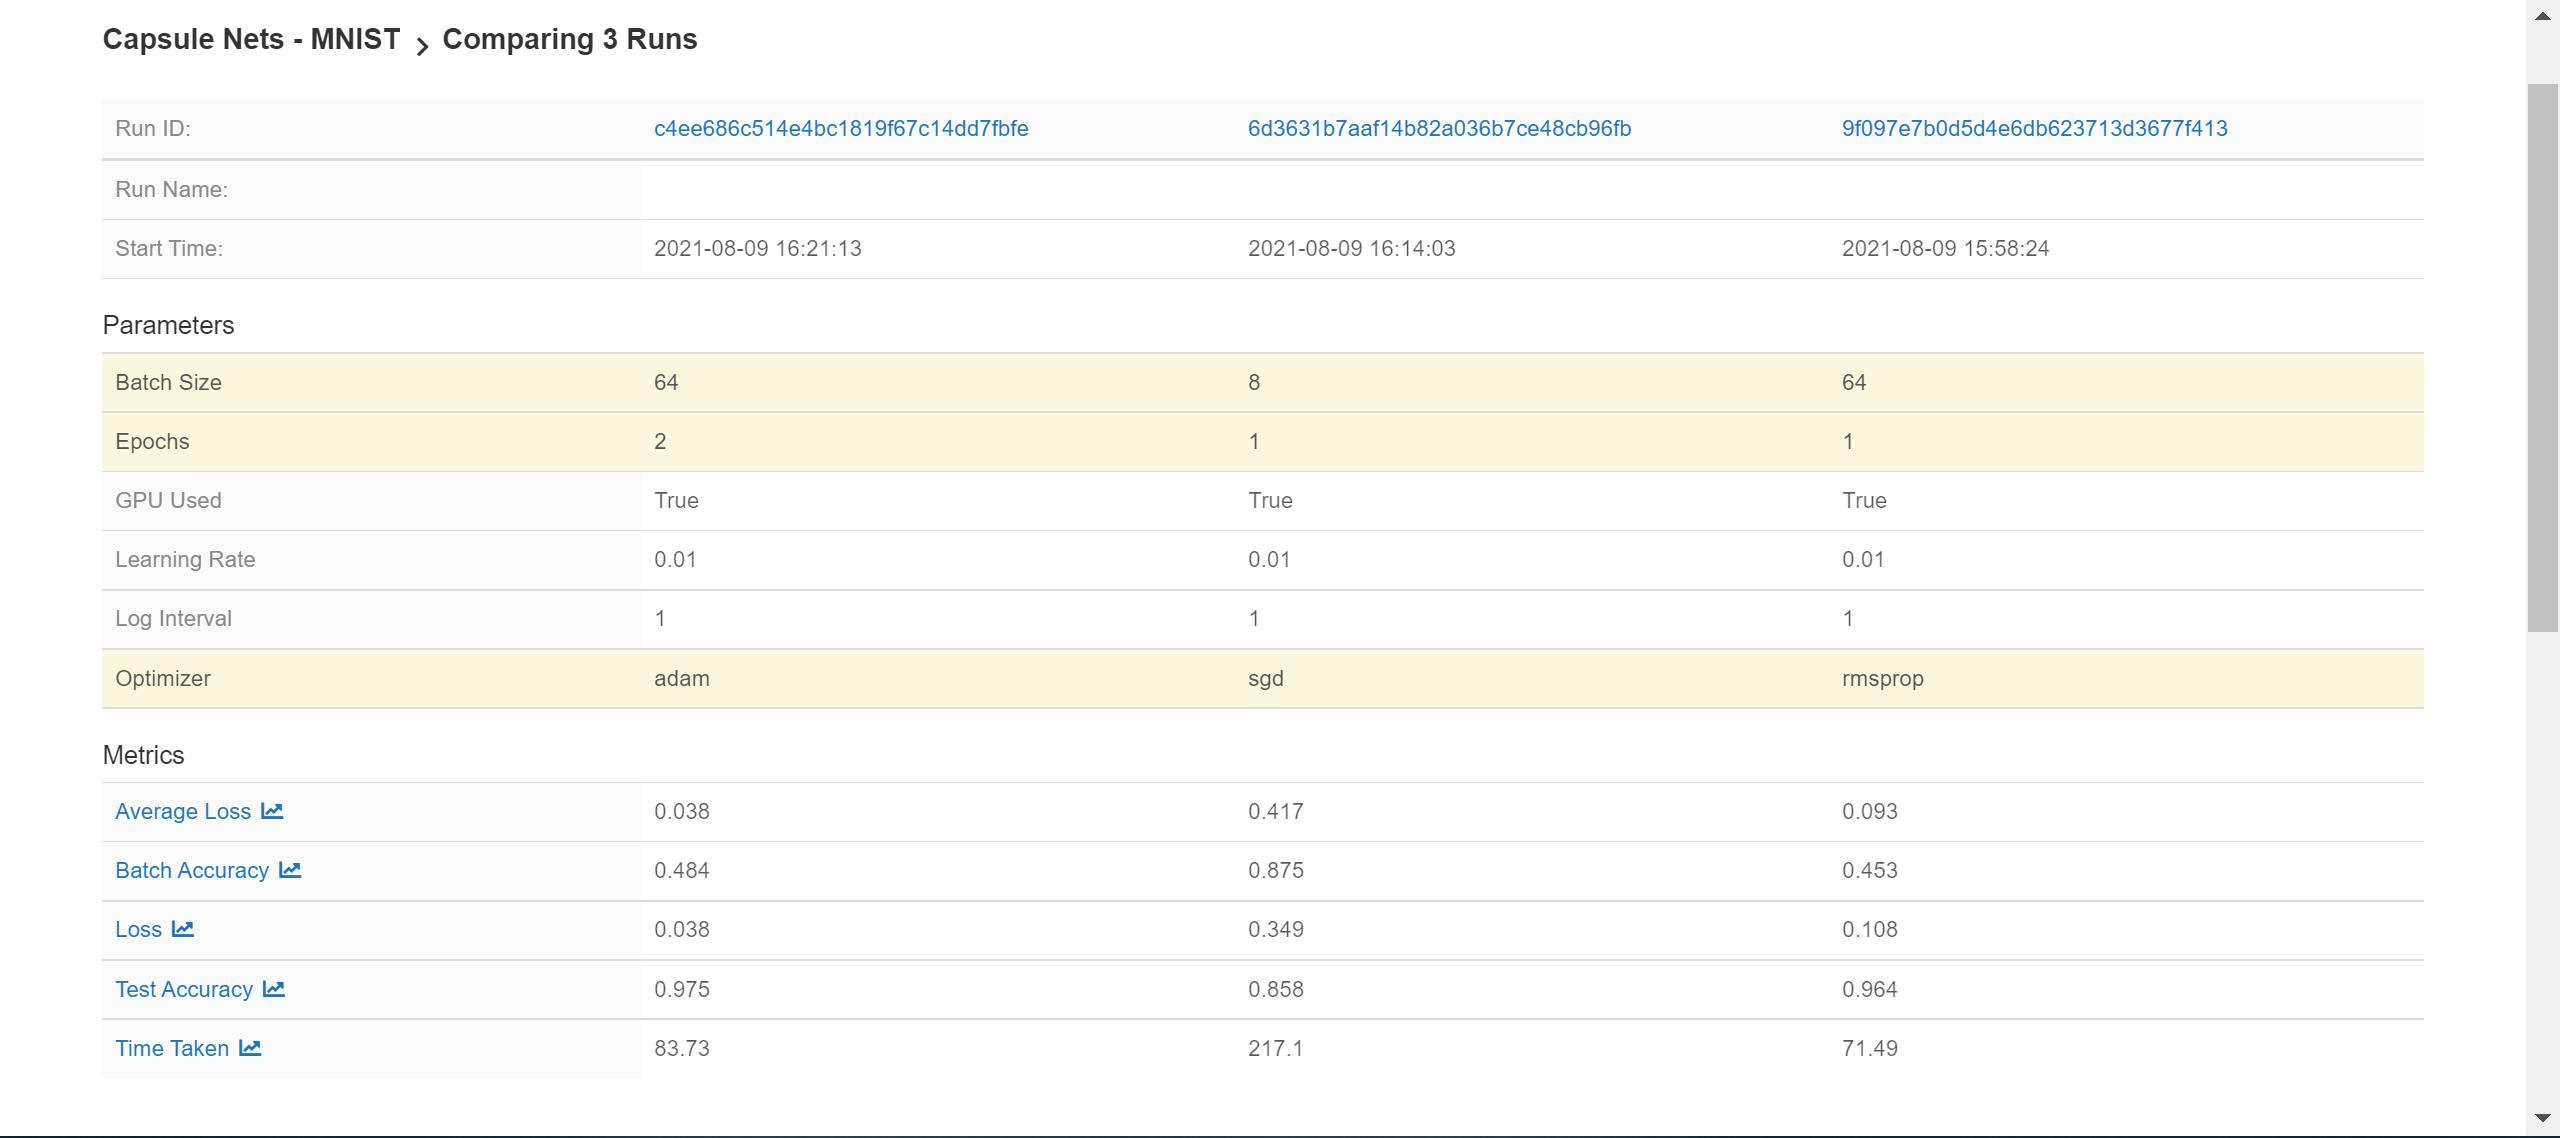
We can also compare the metrics logged in the different runs too:
That brings us to the end of part 1.
You should now:
- Understand the basics of MLFlow
- Be able to track metrics and parameters for each new run of each new experiment using MLFlow.
- Have some familiarity with the MLFlow UI.
If you enjoyed reading this article or if it helped you in any way, a 👏 is appreciated. Do share this article with others who may be interested in the topic too.
Stay in touch with me on Linkedin and Twitter for regular updates. Follow me on GitHub.