Track your ML models with a Model Registry using MLFlow
Deploy MLFlow with a remote artifact & backend store with Docker 🐋
In the previous article, we learned about the basics of MLFlow, using it to track parameters and metrics in PyTorch and viewing & comparing experiments using the MLFlow tracking server.
Objectives of this article:
- Setup an artifact store for the model registry.
- Setup a backend store using a relational database through Docker.
- Deploy the MLFlow tracking server with a remote artifact & backend store.
MLFlow can be deployed in multiple ways
Each of these scenarios is described in detail in the MLFlow documentation here. The 2 methods of our interest are described below:
On localhost:
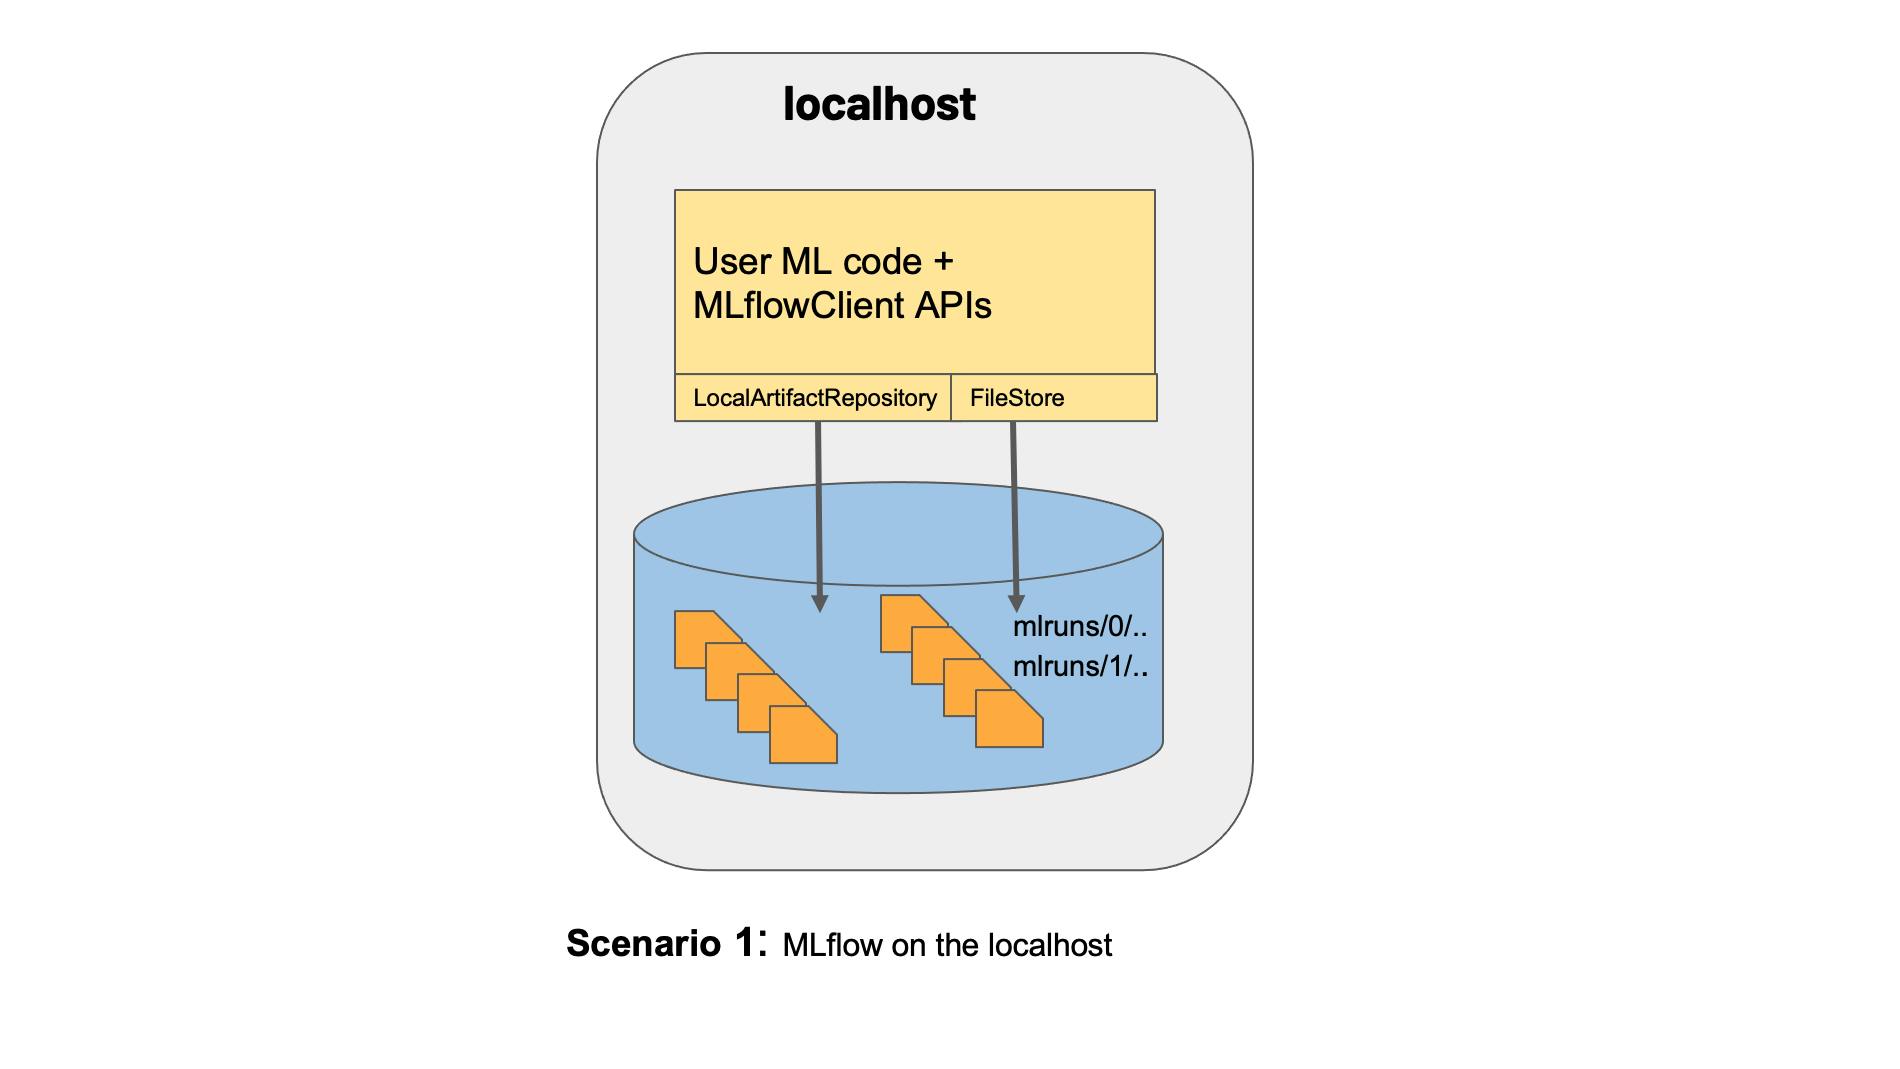 Figure 1: MLFlow on localhost (Borrowed from the MLFlow documentation here).
This is how we deployed MLFlow in our previous article.
Figure 1: MLFlow on localhost (Borrowed from the MLFlow documentation here).
This is how we deployed MLFlow in our previous article.With a remote tracking server, artifact store & backend database:
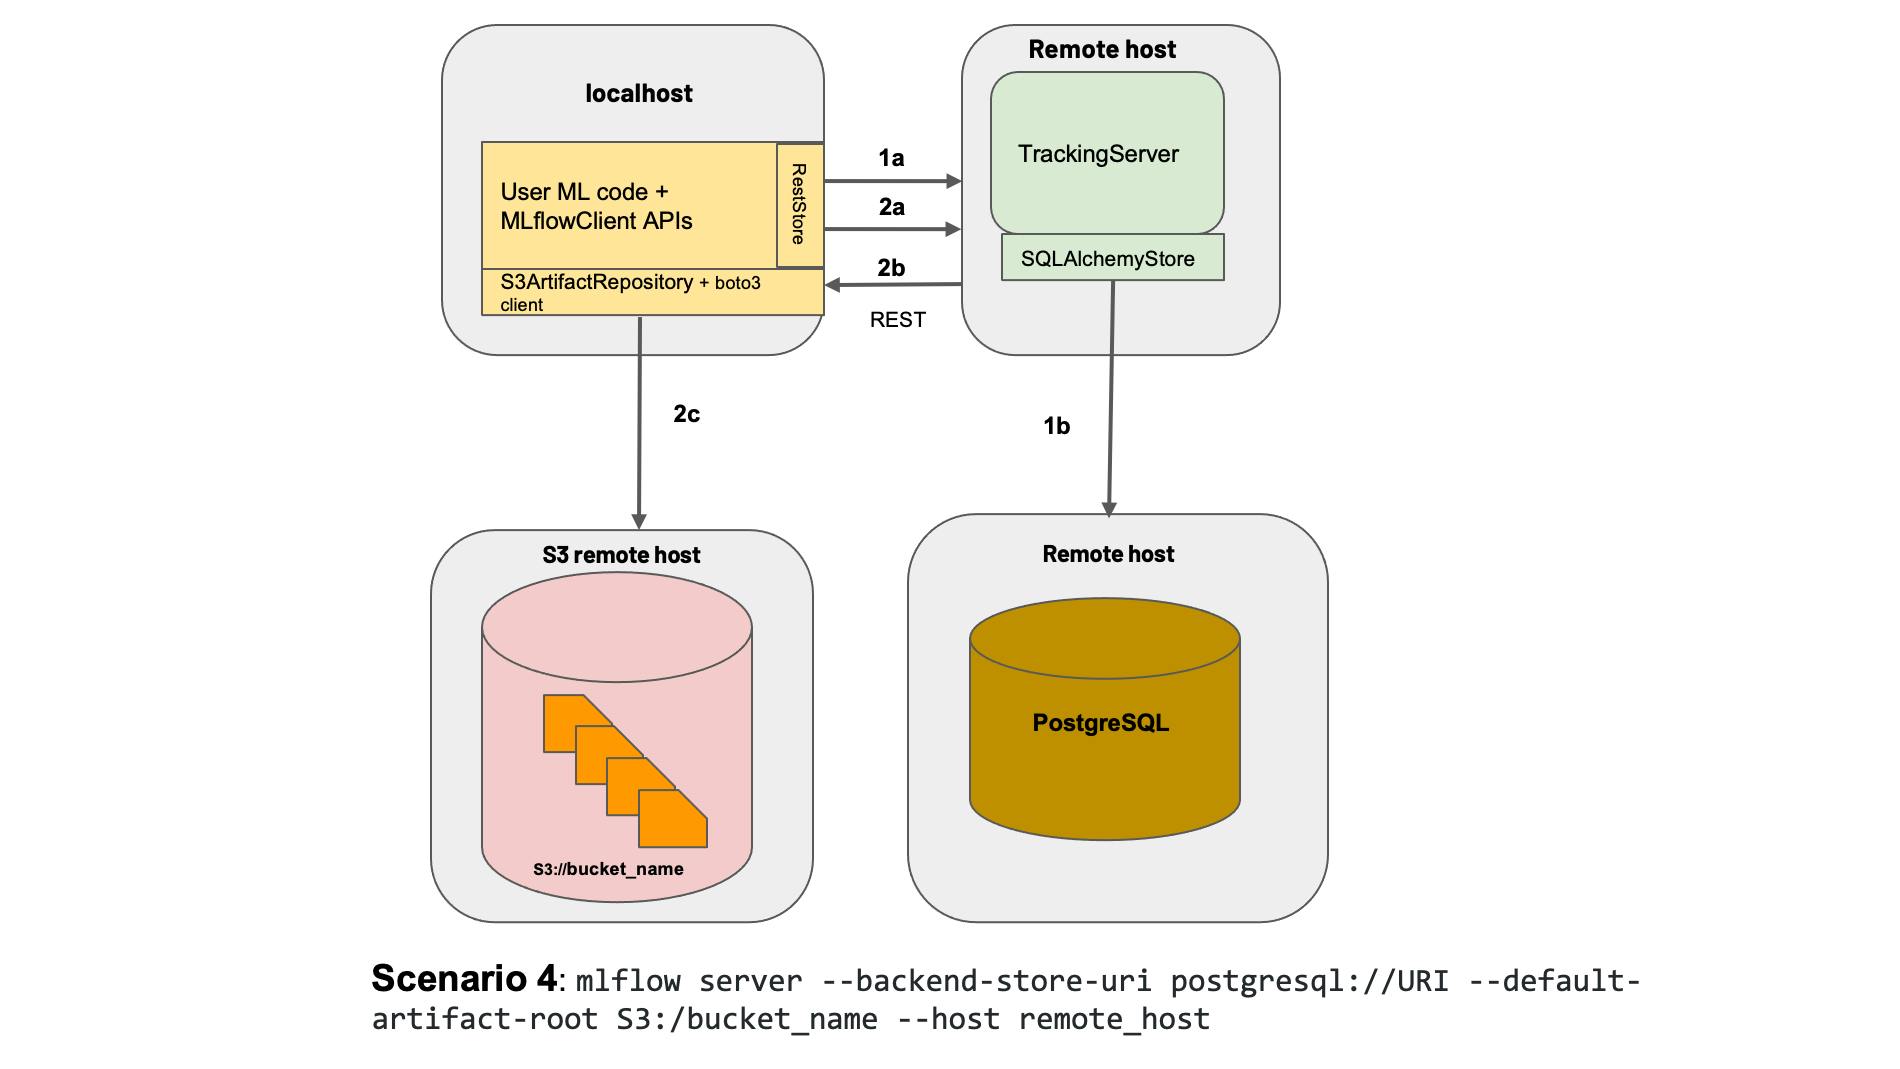 Figure 2: Deploying mlflow with a remote tracking server, backend & artifact store. Borrowed from the MLFlow documentation here.
In our case, the tracking server and backend database are not truly remote. Our tracking server would run on localhost. The backend store will be deployed via docker and would run on localhost as well. Our artifact store, however, will be remote. We will use Google Cloud Storage for this purpose.
The first step in deploying MLFlow in this way requires us to set up a backend store. The backend store we will use is a PostgreSQL database that we will set up using docker. But before we can get into that, I'd like to bring everyone on the same page. So let's start with the basics of docker.
Docker Basics:
A container is a standard unit of software that packages up code and all its dependencies, so the application runs quickly and reliably from one computing environment to another. - What is a container? by Docker
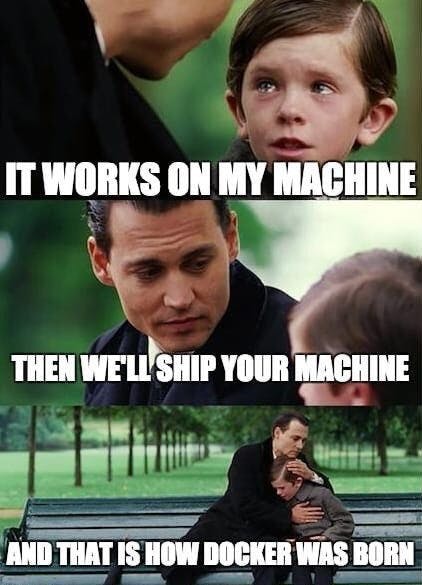
In a nutshell, this is exactly what docker is 😆😆. It's a way to package your app to be ported and run on other systems without further issues.
But isn't that the same as virtual machines m8 🤔??
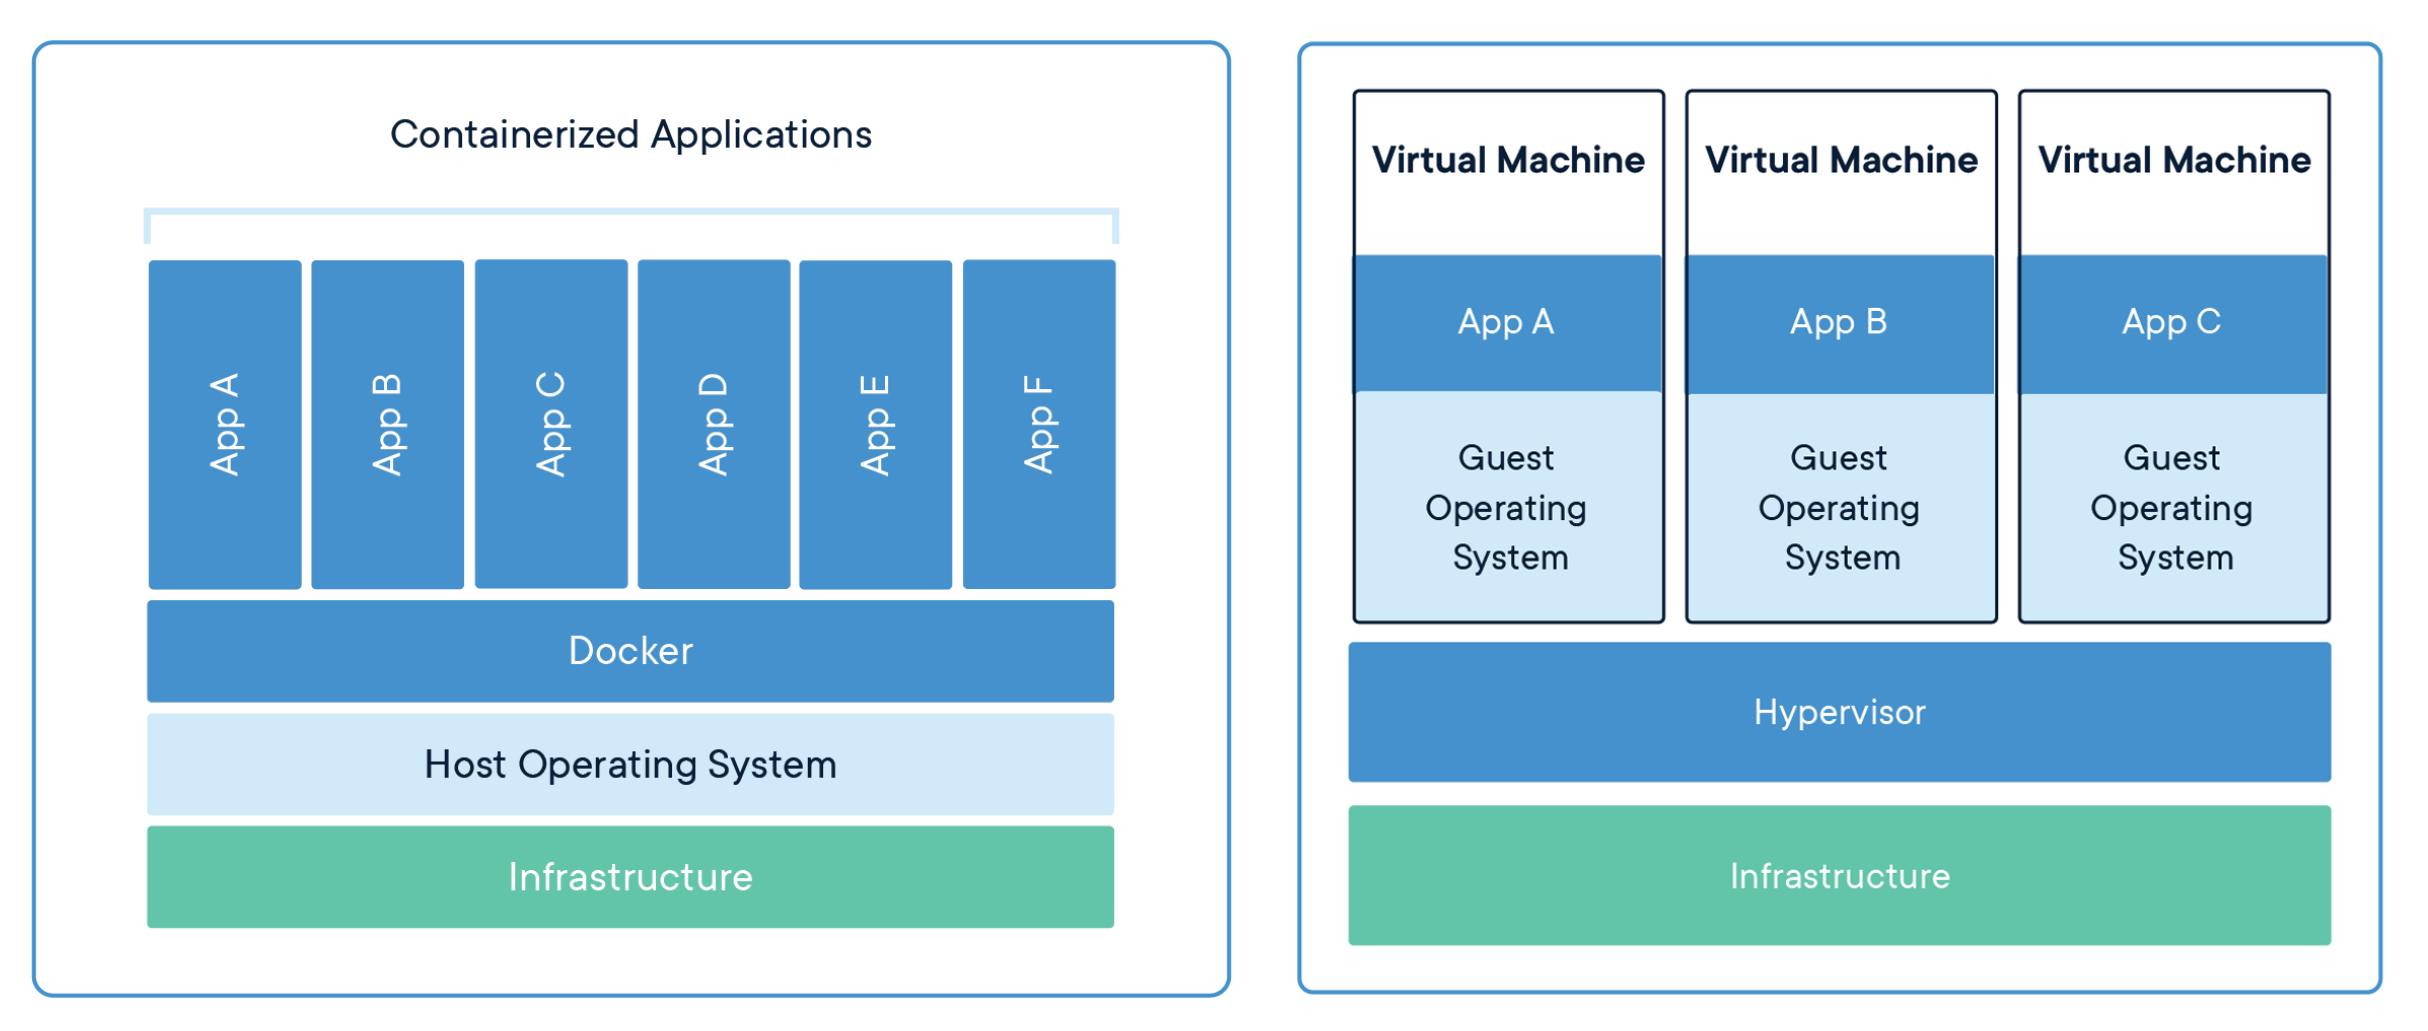 Figure 3: Containers Vs Virtual Machines (From
the article What is a container? by Docker )
Well, yes and no. In short, containers run on the host OS. This means that the container doesn't run its own OS. Instead, multiple containers share the resources as well as the kernel of the host OS. This makes containers lightweight. On the other hand, virtual machines run their own OS that sits on top of a Hypervisor which in turn runs on a host OS.
Here is a great article explaining containers and how they're different from VMs.
MLFlow with Docker
Alright, now that you know what Docker is and its advantages, let's deploy our MLFlow tracking server with a remote backend and artifact store.
The artifact store that we set up is an object store. The popular ones are AWS S3, Google Cloud Storage & Azure Blob Storage. In this tutorial, I will be using Google Cloud Storage, but the overall process remains the same regardless of your cloud service provider.
NOTE: The setup described in this tutorial is for learning purposes and is not recommended for use in production environments.
Step 1: Setup the remote artifact store using Google Cloud Storage
Google offers a free tier for the usage of their cloud services.
First, we need to install the GCloud command line SDK, installation instructions for which can be found here.
After setting up the SDK, go ahead and create a new bucket. I've created a bucket and named it applied-mlops. Next, I've created a subfolder within the applied-mlops bucket and named it mlflow-artifact-store. The complete path for the artifact store is gs://applied-mlops/mlflow-artifact-store.
You may need to create a
credentials.jsonfile for authentification with GCloud. I would recommend setting up a service account and using those credentials for authentication. This translates well into the Kubernetes setup we will explore in later articles. Once you have set up a service account, you need to set theGOOGLE_APPLICATION_CREDENTIALSenvironment variable to the path of the credentials file. The command would look something like this:export GOOGLE_APPLICATION_CREDENTIAL=/path/to/credentials.json. MLFlow uses this to push the artifacts to Google Cloud Storage.
Awesome, now we have set up google cloud storage for storing all our artifacts.
Step 2: Setup the backend store with PostgreSQL and Docker
For setting up the PostgreSQL database, we will use docker. The docker image we will use is the one from Bitnami: hub.docker.com/r/bitnami/postgresql
Go ahead and pull the docker image: docker pull bitnami/postgresql.
Next let's setup the backend store. To deploy the database run:
docker run --name mlflow-database \
    -v /home/username/mlflow-db/:/bitnami/postgresql \
    -e POSTGRESQL_USERNAME=admin \
    -e POSTGRESQL_PASSWORD=password \
    -e POSTGRESQL_DATABASE=mlflow-tracking-server-db \
    --expose 5432 \
    -p 5432:5432 \
    bitnami/postgresql
Let me explain what each of these parameters mean:
--name mlflow-database: This sets the name of the container to mlflow-database-v /home/username/mlflow-db/:/bitnami/postgresql: Mounts the local directory at/home/username/mlflow-dbto the directory/bitnami/postgresqlwithin the container itself. But why use this? Data generated in containers are ephemeral by default. Once the container stops, any data stored in the container is lost. To keep the data persistent, we need to mount a local directory on our local machine to a directory within the container. In this case, anything stored in the/bitnami/postgresqldirectory within the container will result in the data being saved in the/home/username/mlflow-dbdirectory on our local machine. Thus, our databases are now persistent and are not lost even after the container stops running. Note that since we are running our docker containers in non-root mode, UID 1001 must be given read and write permissions to the/home/username/mlflow-dbdirectory. For more info, look at the Persisting your database section on Bitnami's PostgreSQL docker hub page.-e POSTGRESQL_DATABASE=mlflow-tracking-server-db: Creates the mlflow-tracking-server-db PostgreSQL database.-e POSTGRESQL_USERNAME=admin: Sets admin as the username for the PostgreSQL database-e POSTGRESQL_PASSWORD=password: Sets password as the password for the PostgreSQL database.--expose 5432: PostgreSQL runs on port 5432 by default. This parameter tells docker that we'd like to expose this port for use on our local machines.-p 5432:5432: Binds the port 5432 exposed on the container to the port 5432 on localhost.
Step 3: Deploy MLFlow tracking server
Now its time to put it all together:
- Run the PostgreSQL database using the docker run command described in step 2.
- Run the MLFlow tracking server:
mlflow server \
 --default-artifact-root gs://applied-mlops/mlflow-artifact-store \
 --backend-store-uri postgresql://admin:password@localhost:5432/mlflow-tracking-server-db
--default-artifact-root gs://applied-mlops/mlflow-artifacts: Sets the google cloud storage bucket we created in step 1 as the default artifact store. All artifacts (models, images, etc) generated by an experiment run are uploaded to the artifact store speficied here.--backend-store-uri postgresql://admin:password@localhost:5432/mlflow-tracking-server-db: MLFlow connects to any SQLAlchemy compatible database. PostgreSQL is one such database. The URI specified here is an SQLAlchemy database uri. The general syntax isdialect+driver://username:password@host:port/database. In our case, the dialect ispostgresql, the username isadmin, password ispassword, host islocalhost, port is5432and the database name ismlflow-tracking-server-db.
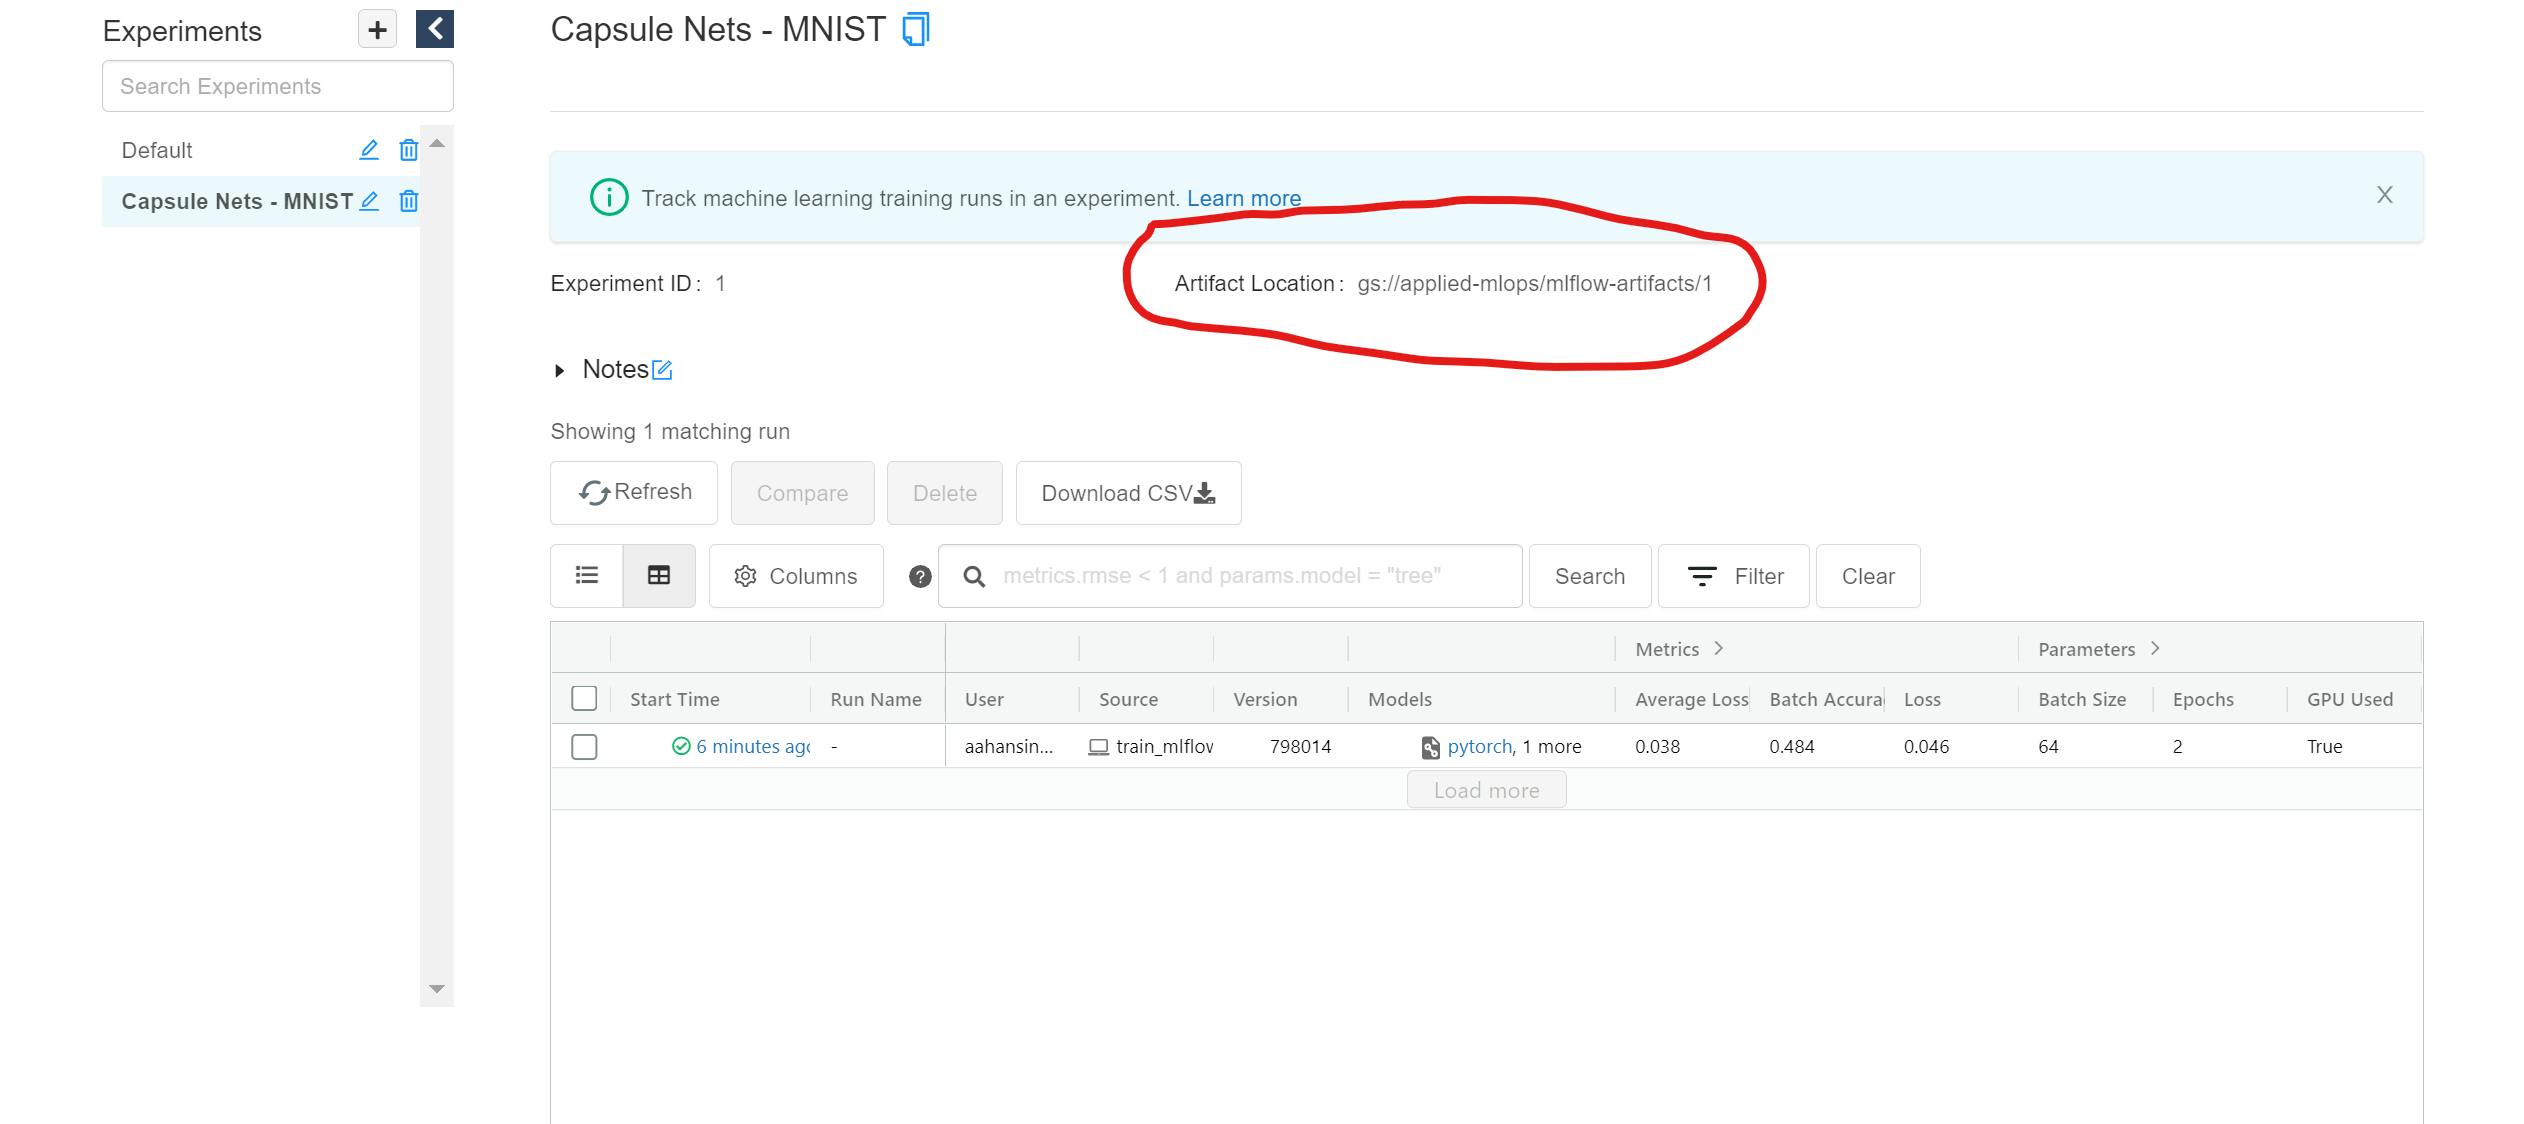
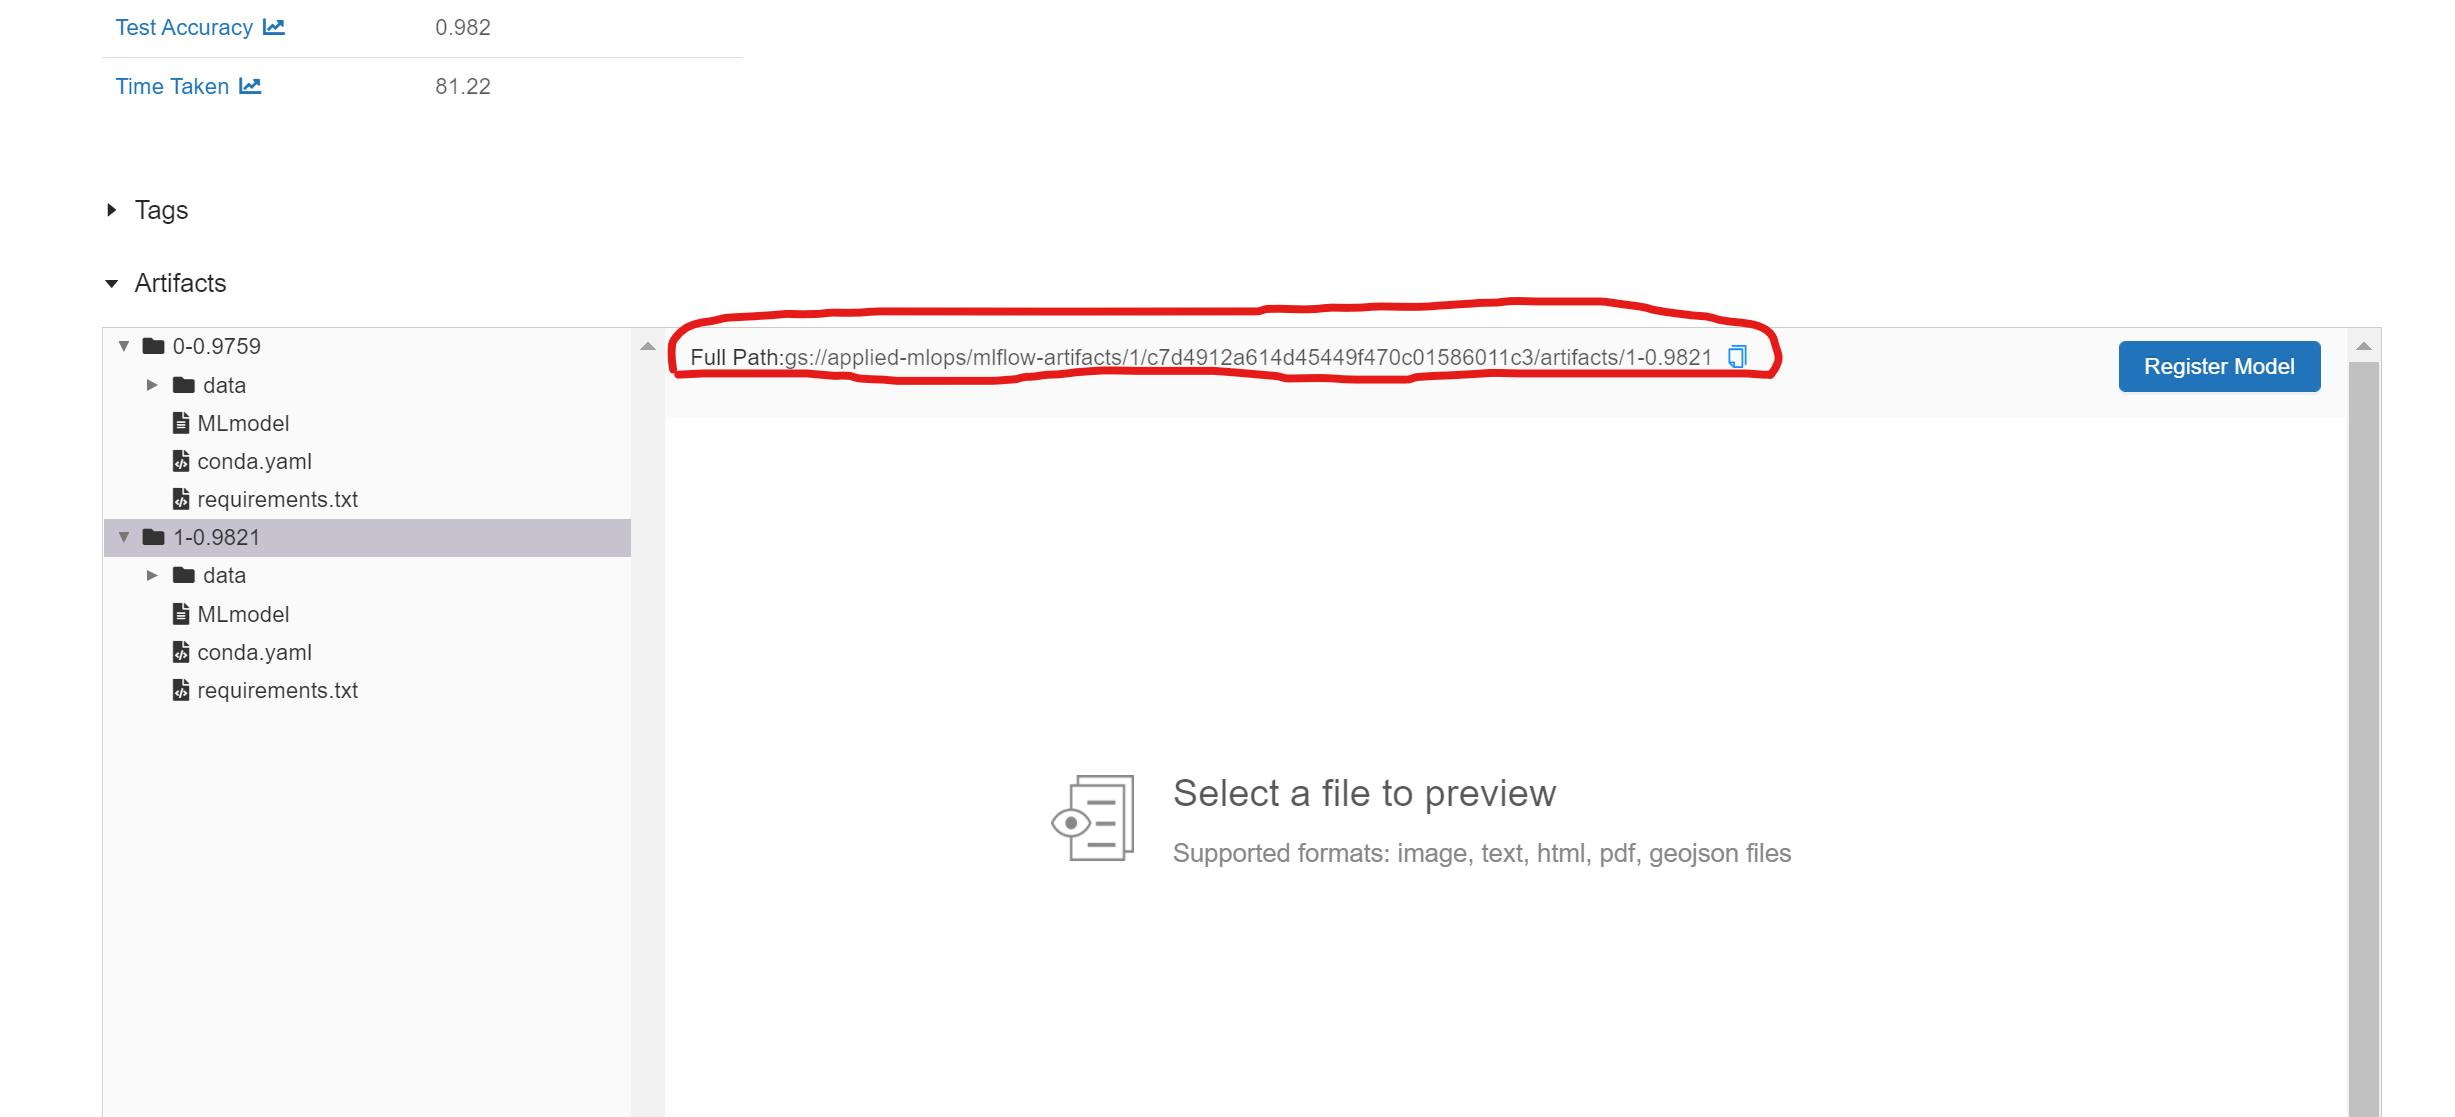
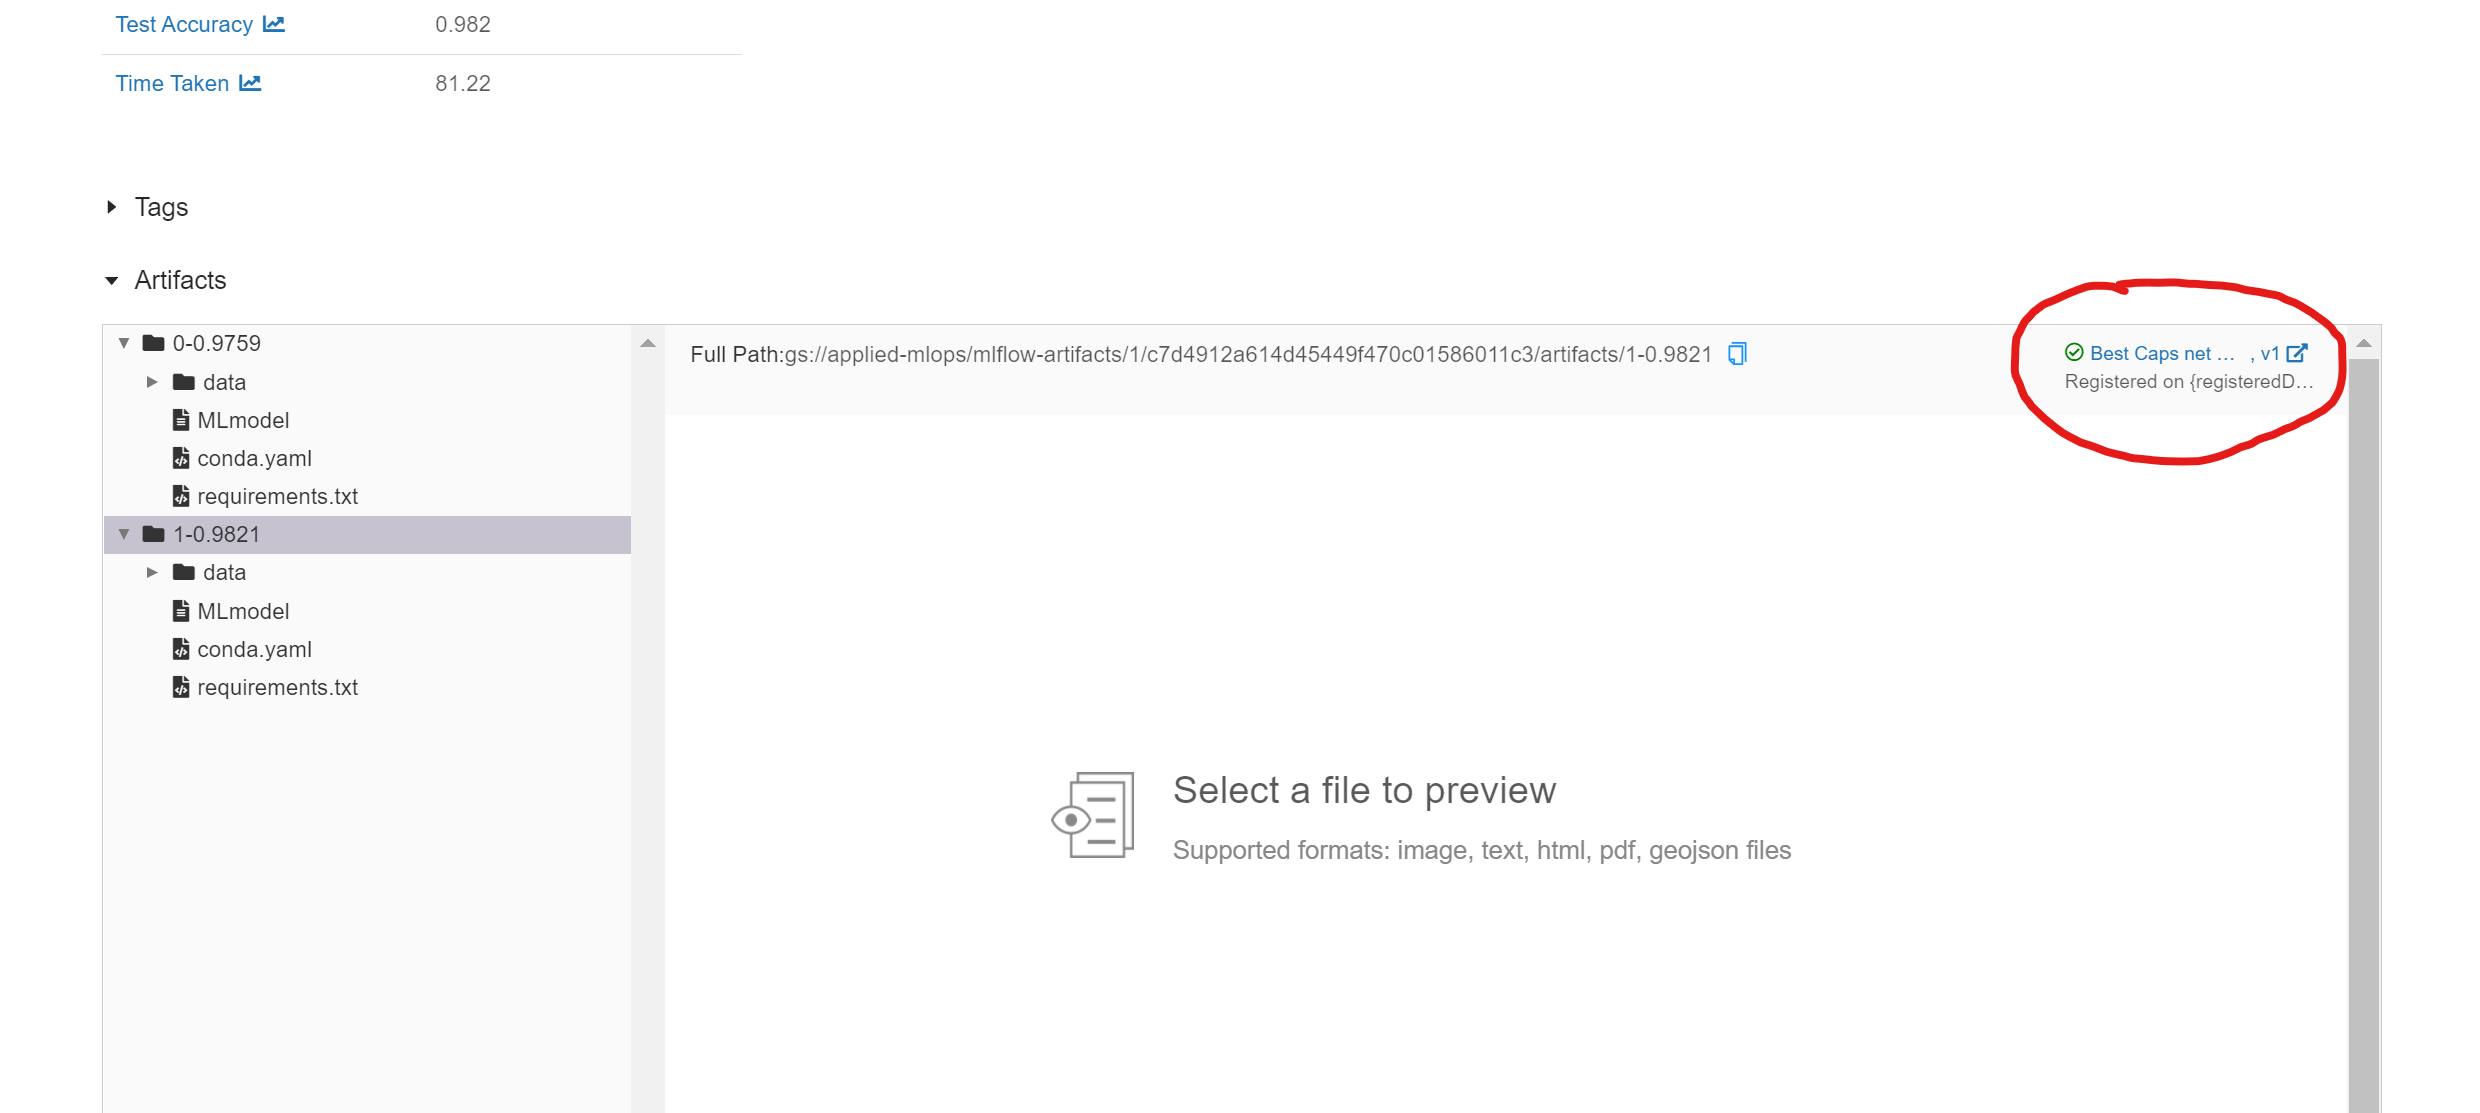
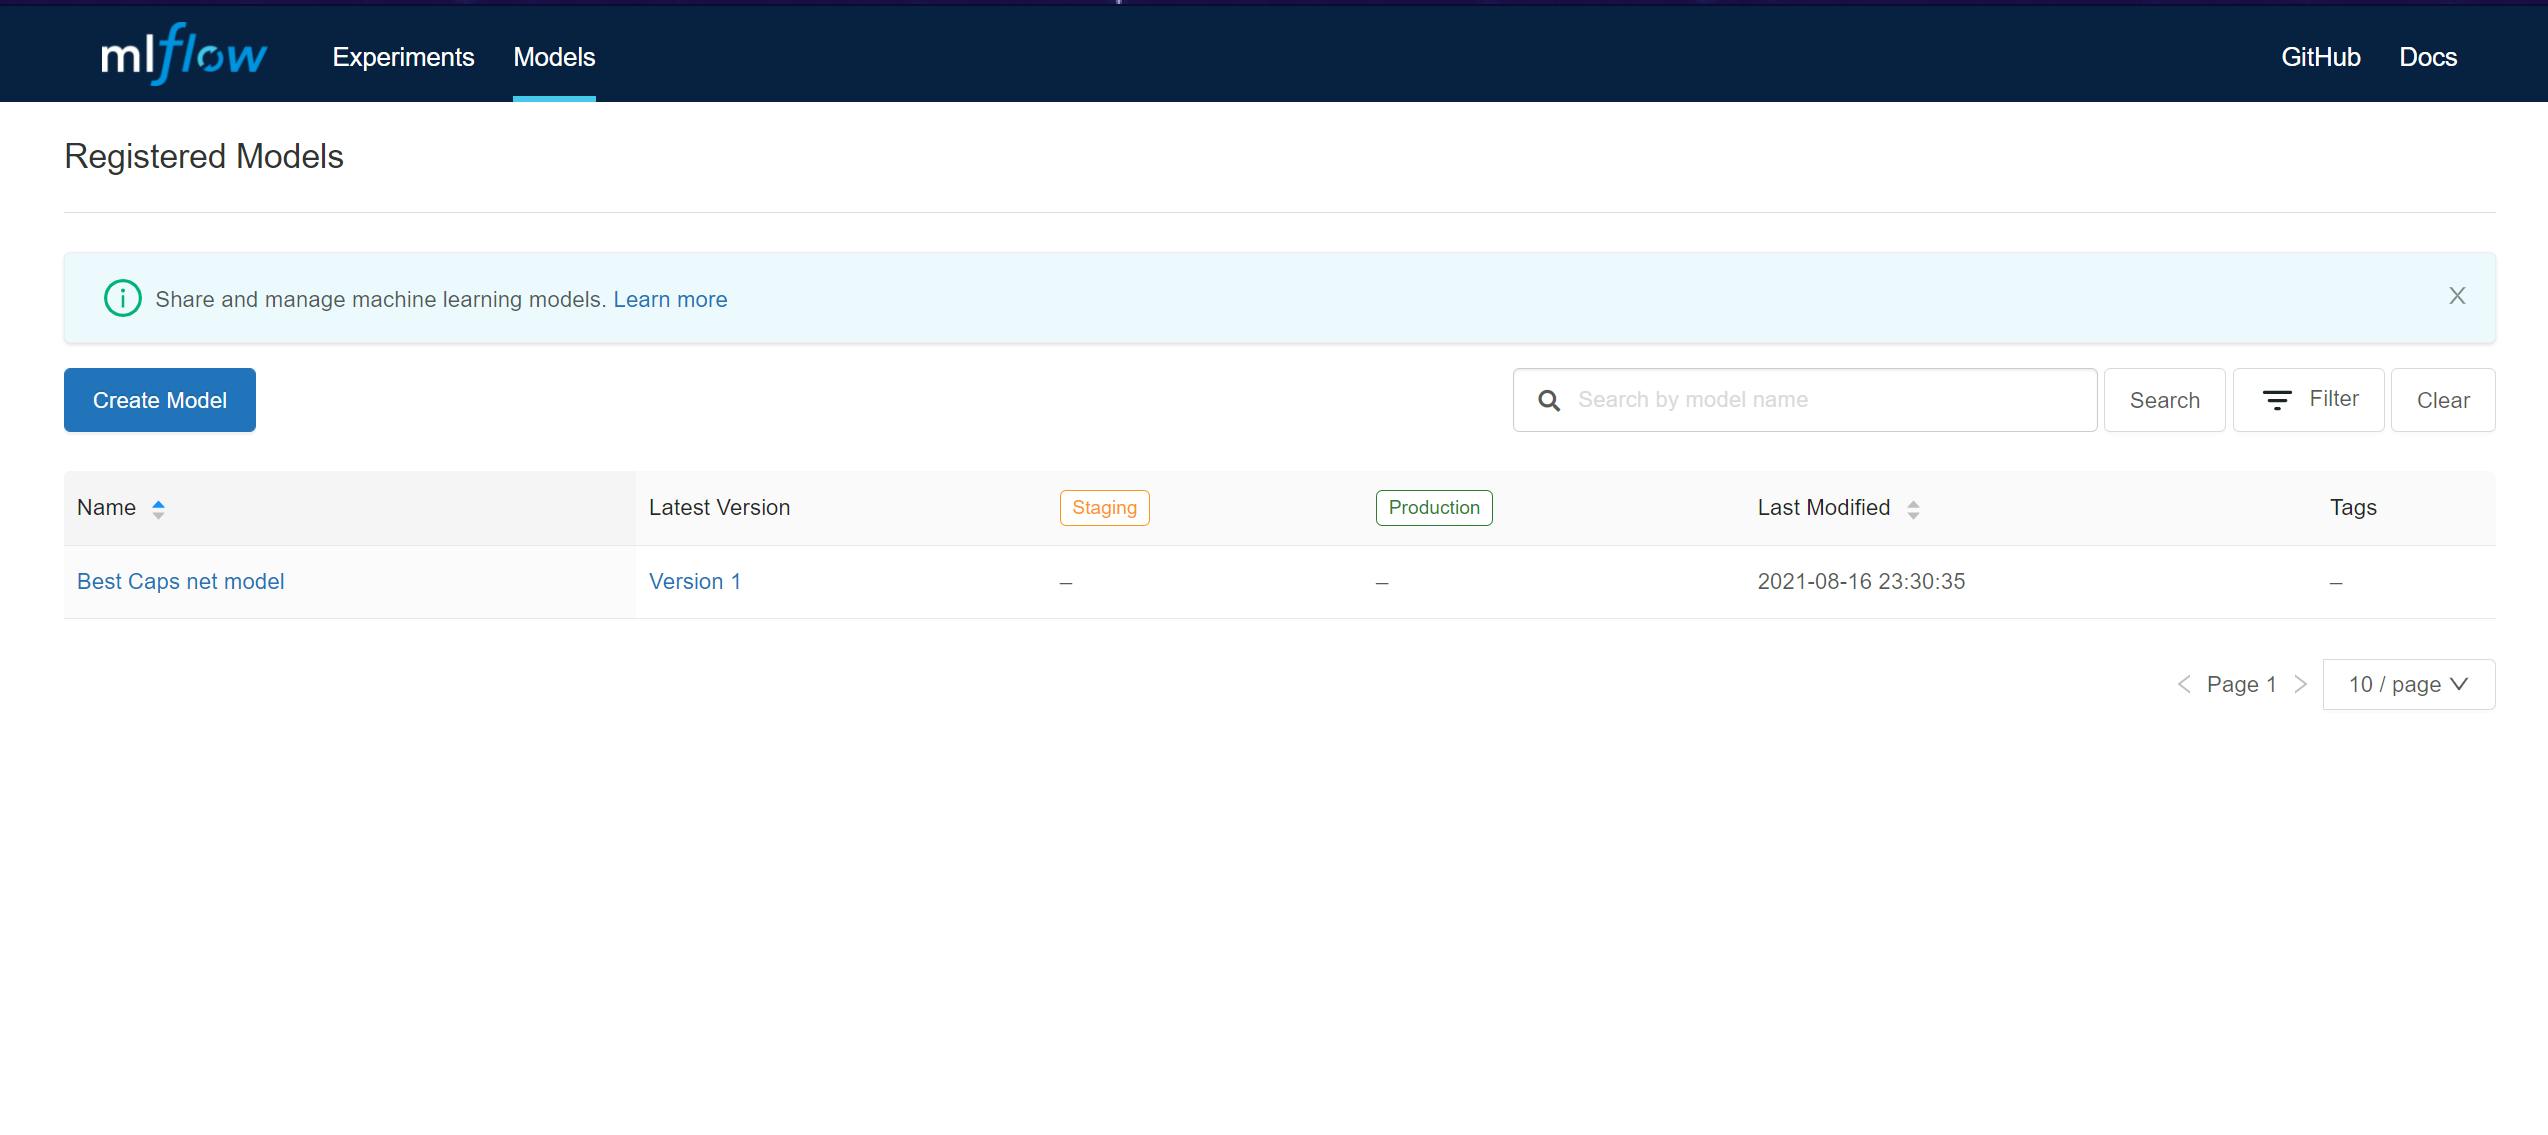
Once the tracking server is up and running, you can view the UI at localhost:5000. As we learned in the previous article, the UI is initially empty and has only a Default experiment. However, after a few runs of an experiment, you will now see a few new bits of info in the UI:
- The Experiment page now shows the artifact location:
- For each artifact, the complete path of the artifact stored on google cloud storage is also displayed:
- We can now add models to the model registry by clicking on the Register Model button next to each model in the artifact section. After registering the model, the Register Model button is replaced with a link to the model in the model registry:
- We can now view the complete model registry under the Models tab in the MLFlow dashboard:
How cool is this !!!! We can now track all our experiments, compare multiple runs of the experiment AND save every artifact generated to the cloud 🔥🔥🔥🔥🔥.
Look at you, you MLOps expert 😎
You now know how to:
- Set up a remote artifact store.
- Set up an SQLAlchemy compatible backend store using Docker.
- Run the MLFlow tracking server with a remote backend and artifact store.
Also, here are a few resources to help you get better at Docker:
Pssst, Hey 🙋♂️, I anticipate that you may run into issues and errors while trying out this tutorial. Feel free to leave comments about any issues you're facing, and I will address them all. You can also contact me on any social media, and I will try my best to help you out 😁.
If you enjoyed reading this article or if it helped you in any way, a 👏 is appreciated. Do share this article with others who may be interested in the topic too.
Stay in touch with me on Linkedin and Twitter for regular updates. Follow me on GitHub.
